Monday, April 28, 2014

Mini poker chip earrings

Last August, Steve and I went to an Adam Ant concert at the Turner Hall Ballroom in Milwaukee.  We wanted to get a souvenir, but we didn't want to spend a lot of money, nor did we need another T-shirt.  The guitar picks were well within our price range, so we bought two so I could make earrings.

Since they're solid plastic, the way to make earrings out of them is to drill holes in them.  I've been putting that off because I was nervous that I was going to crack the picks.  I was going to get some plain picks so I could practice, but I never got around to doing that.

Today I remembered that I had some mini poker chips, which should be a good test.  I don't know where these came from, but it was probably my mother's basement.  That's where I've found all sorts of neat things like mini Rummikub tiles, old wooden checkers, and antique dominoes.

I used Steve's pin vise (a very small hand-held drill) with a small drill bit to make the holes, then I used the Groovy Looping pliers I've talked about (my review can be found here) to hang the chips from earring wires.  To add a little bling, I added a 6mm blue crystal and a 4mm red crystal to each earring to reflect the other poker chip colors.

If you'd like to see exactly how to do it, I made a video for you!  This was done in one take, and I have to warn you that my hands are a little big sometimes.  They also look dry.  I should use some lotion.


For those of you who will be skipping the video, here's a picture of the earrings:


Tomorrow I'll show you the Adam Ant guitar pick earrings.

Sunday, April 27, 2014

Two-holed lavender checkerboard earrings

I'm taking a little break from stitching after finally finishing the triangle bracelet (which will henceforth be called "Dino-spine" since no one has come forth with any better names).  In looking for something to make today, I came across some two-holed lavender checkerboard beads I got from... yeah, I don't know.  I have so many beads with unknown origins.  Slowly but surely I'm using them up.

I put one headpin in each hole and twisted the headpins all the way up the length.  I then did a partial wrapped loop because the headpins were too hard to really do a good wrapped loop.  I should have used softer ones, but Steve was cooking dinner, and I didn't have a lot of time.  Actually, dinner is about ready, so I'm just going to show you the earrings so (for once) I can be done before Steve starts eating without me.  :)


Saturday, April 26, 2014

First Communion card

One of Steve's relatives (a daughter of a cousin) is about to have her first Communion.  We wanted to send her a card, but neither of us is Catholic or knows much about the first Communion traditions or rituals.

Fortunately I had a cross in one of my Cricut cartridges, so I cut a layered cross and put it on a lacy-punched background:


(Steve assures me that the right side is punched straight and that it looks slanted because of perspective.)

For the inside, I wanted to use a stamp from the Stampin' Up! Elegant Greetings set on a white background that we could also write on.  However, when I put the rubber on the wooden block years ago, I put it on crooked.  Argh.  After a number of attempts at stamping it straight, I stamped it on a smaller piece of paper and ripped the edges.  Steve had suggested trimming after stamping, but I couldn't figure out how to do that.  He then suggested ripping the edges, and I thought that was a marvelous idea.

I also wanted to give her a little cross pendant I got from somewhere at some point in time.  I don't know its origins.  I thought this little girl would give it a good home.  I attached it with a bit of wire, and she can easily take it off and put it on a pendant.


I swirled her name to protect her privacy.  :)

It's going in the mail on Monday, and I hope she likes it!

Friday, April 25, 2014

The triangle bracelet is finished!

Huzzah and hooray!  I have finally, finally finished the "possible something"/"triangle bracelet".  If you missed the previous posts, you can catch up here, here, here, and here (those links are in chronological order).  As you can see, this bracelet took a long time.  Part of it was because I was designing it, and part of it was that it's a time-consuming bracelet to make.

Here's how it turned out:


The purple side is a bit darker in that picture than it really is.

There are fifteen double-sided triangles in that bracelet.  It's a bit larger than what an average person would need because of my mutantly-large wrists.  I don't always do it, but I frequently make the first one of a new design big enough to fit me so I can see how it feels and make sure everything works okay.

Let's take a look at it on one of my mutantly-large wrists:


The triangles stick up nicely:


Stretching the curve out causes a natural zigzag that adds an interesting look to the piece.

Here's the clasp end:


It works just fine!  Whew!  The clasp is a mighty important part of any bracelet.

So, all that's left is to choose a name and write up the tutorial.  I have gone around and around trying to come up with a name.  Technically, they're little triangular prisms.  They also look like pyramids or spikes from a dinosaur's spine.  Steve threw out "Dino Spine", and that's the best I've heard so far.  He also suggested "Prism Break", but that's being used by a company that helps people opt out of global surveillance.  I don't want to mess with them.  "Pyramid Row"?  "Circle of triangle prisms"?  A friend suggested I look up words in other languages, but that's not working for me, either.  "Dreiecksprismen"?  (That's "Triangular prisms" in German.)  Help me out here, folks.  Please give me your thoughts in the comments section or by e-mailing me at traci@creative-pursuits.biz.  Thanks!

Thursday, April 24, 2014

Wishy Fishy bracelet and earrings

I am this close to being done with that triangle bracelet.  Do you see how close together my fingers are?  I am at the same place I was last night, but I have figured out the clasp attachment.  There was a lot of discussion, tearing apart, and experimenting.  All that's left is to stitch half a triangle on one side and two or three more on the other, and it's done.  Tomorrow.  It will be done tomorrow.  Of course, as I'm writing this it's technically tomorrow, so that gives me some leeway.  :D

But that doesn't give me a topic for tonight.  Fortunately I had some new beads that were just begging to be used.


I love when bead stores give you a free gift with purchase.  It could be a whole goody bag or just a tube of beads.  It doesn't matter.  It's nice to get something for free, but it's also a good way to experiment with beads you may not have thought to buy on your own.

One of the free tubes of beads I got from Knot Just Beads a few years ago were "Beads the leaf outta me":


They're pretty, but I'm fond of buying single-color, single-shape, single-size beads.  Not only are these different sizes, shapes, and colors, but the holes aren't even in the same places.  Some of the holes are front to back, some are left to right, and some are top to bottom.  It's chaos!  Oh - there are also yellow and brown beads in here, too.  ::shudder::  I don't buy many yellow and brown beads.  Steve loves yellows and browns and those sorts of colors, but I love purples (big surprise there), blues, pinks, and greens.  Mostly purple, though.  :)

Somehow I ended up with a few tubes of these leaves.  Oh - I just looked it up.  She gave them away in different goody bags for events I went to.  The upshot was that I had a lot of these leaves and needed to do something with them.

I played around with them and the spiral stitch and ended up with my "Falling Leaves" design:


This design teaches spiral and how to adapt the spirally bits (that's the technical term) based on what kind and size of leaf you have.  You can easily adapt it for different types of leaves or other beads.  (If you'd like to purchase this tutorial, send $7 through PayPal to traci@creative-pursuits.biz with the note "Falling Leaves tutorial", and I'll e-mail it to you!)

Since I had such great success with the leaves, I'm more comfortable with bead mixes like this.

The most recent giveaway that Knot Just Beads had was on Good Friday.  Since eating fish is a big Catholic tradition on the Fridays during Lent, Kim had a "Fish Special": a free tube of "Wishy Fishy" beads with purchase:


Since the fishies are on my usual purple background, you know I took advantage of this fish special.  Each tube had one large fish and quite a number of small ones.  I picked through the tubes and found this one with a yellow-green large fish that I thought was cute.

At this time I'm not planning a new design for the fish (I have my hands full right now with unwritten tutorials), but I wanted to do something special with them.

The first thing I did was make a pair of earrings that kind of look like they're on the line:


The blue beads are meant to be bubbles, and the silver bugles are the fishing line.

As I was making the earrings I had an idea for the bracelet.  I was going to put it off, but I knew that tomorrow I'd be working on the triangle bracelet, and I need to get back to knitting the baby pullover I'm testing.  I also didn't want to wait because I wasn't sure if what I wanted to do was going to work.

I wanted to simulate air bubbles coming up from the mouths of the fish (I have no idea what the possessive plural of "fish" is - fishes'?).  I also wanted to use a more conventional technique than stitching or working with wire like I did the last few days (the wrapped-loop necklace and bracelet).

I grabbed beading wire (the kind used for regular stringing), crimp beads, and my Xuron 4 in 1 Crimper.  I cut a piece of wire about 12 inches so I'd have plenty to work with.  Although I did have enough, I would have felt more comfortable with another 3 inches or so.  I got twitchy for the last two fish.

Here's the final bracelet:


Between each fish is a loop of seed beads.  I strung three small seed beads and one bigger one.  Holding the first two small beads tight against the fish, I looped the wire around and went through the second one again.  Once that was tight, I added one more small seed bead before adding the next fish.  Now that I'm looking at it again, the bubbles could be coming out of either end of the fish.  Oops!  Do fish fart?  Next time I'll add a few more seed beads before the next fish.

The bubbles like to move around, but when the piece is worn, for the most part they stick up like they're floating to the surface.


I think it's super cute.

Here's a zoomed out shot of the bracelet:


(There's nothing like using a piece of wire to put a bracelet on and seeing your pudgy hand in pictures to make you want to eat rice cakes for every meal.)

I have enough fish left over to make a necklace, but I'm not sure this technique would work for a necklace.  I may have to break out the needle and thread and make one using the same technique as with the leaves.

Have you done any experimenting with free-with-purchase beads?  I'd love to see what you've come up with!  Send a picture or three to traci@creative-pursuits.biz, and I'll blog about it.

Wednesday, April 23, 2014

Might as well finish the set (purple wrapped loop necklace)

Monday I made earrings.  Yesterday I made a matching bracelet.  Today when I was contemplating what I would do, I had two options: try to finish the triangle bracelet or make the necklace that matched the earrings and bracelet.  Since I haven't quite figured out how to attach the clasp for the triangle bracelet (it really needs a name) and still have at least 4 more triangles to make, I decided to make the necklace.  Once I'm finished blogging, I'll get to work on designing the clasp mechanism so hopefully I can show you a finished bracelet tomorrow.

If you recall from yesterday, I had nine of those purple glass beads left.  There were five cylinders, three round ones, and one teardrop.  I couldn't be completely symmetrical with that count, but if I pretended that the teardrop was round, I could.  A teeny bit of asymmetry is nice every once in a while.  I found some small round beads that matched really well.  They're something between pink and purple and are transparent enough to blend in with the larger beads.


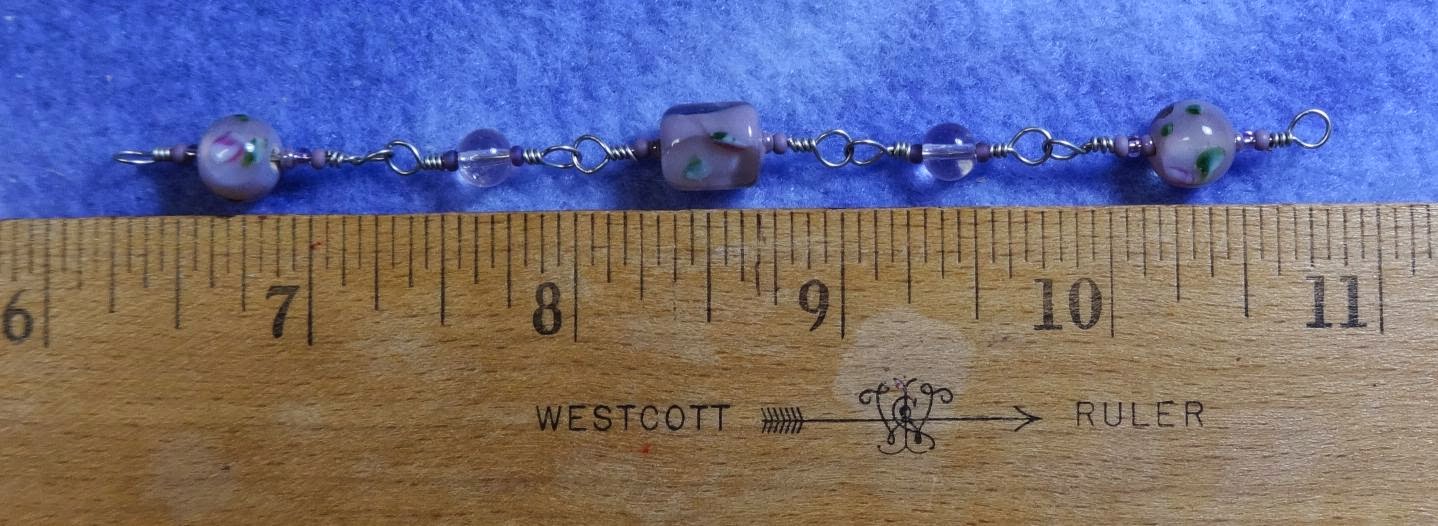
Yesterday I created the bracelet by starting with the clasp ends and working toward the center.  For the necklace, I knew what I wanted the middle bead to be, so I worked out from the center.  I interspersed a few of the small rounds between the bigger beads but remembered my mission was to use all of those purple glass beads.

Here's how it looked after a few segments:


My necklace beading board is still missing, but my trusty ruler worked just fine for what I was doing.  I centered the bead at the 8.5" mark because I wanted the necklace to be around 17" before I added the clasp so the finished necklace would be around 18". 

Here's the entire finished necklace:


Here's a closeup of the middle bit on a lighter background:


Okay - now that those beads are used up, I'm going to go work on the triangle bracelet.  Sawtooth?  No, I just looked at sawtooth images.  The bracelet doesn't have that kind of slant.  It's more like a zigzagging zigzag.  Anyone have any ideas?  Leave a comment here, please!

Tuesday, April 22, 2014

Purple wrapped loop bracelet

Today's project is a bracelet to match yesterday's Purple trio earrings.

Yesterday I talked about dangling a string of the glass beads from wrapped loops.  I decided instead to cluster the beads on different lengths of headpins.  For today's bracelet I decided to follow that original plan.

Using the bracelet beading board I've talked about before, I made a few units and set them down to measure:


The last time I used the bracelet beading board was for the pink cube bracelet I donated to the Cinderella project.  I started in the middle for that bracelet and added beads to either side of the center bead.

For this bracelet, I decided to work from the outside in.  That way I could see what the length was with the clasp on and evaluate what I was going to do next with every unit added to each side.  My first attempt was just under 7", which seemed a little short to me.  I cut apart one unit, remade it, and added one more unit with the slightly smaller round bead:


The bracelet is a bit over 7.5" now, which should be a good length for sale.

Here's a closer look at the finished bracelet:


I should mention that I used the Groovy looping pliers to make the wrapped loops.  As I mentioned in my review, they are great to work with!

I talk a lot here about using up my old beads.  I was hoping there would be enough of these beads to make a matching necklace, but I only have 9 left.  I could make another bracelet (strung instead of with wrapped loops like this one), or I could take some other beads and make a necklace in the same style as this bracelet.  I think I'm going to make a necklace.  Even though I will put the pieces out for sale separately (instead of as a complete set), I like starting out with the option for someone to purchase all three pieces.