Showing posts with label vinyl. Show all posts

Tuesday, September 2, 2014

Vinyl decals for a dental hygienist's office

Kate is a good friend of mine, and she's been over to my house a time or two.  She loved the decals I put up in our kitchen, so when the dentist she works for gave her leave to paint and decorate her room any way she wanted, she knew that she wanted to incorporate some decals in her decorating scheme.

She ordered the words "HAPPY", "SMILE", "BRUSH", "&", "FLOSS", and later she asked if I could cut "OPEN WIDE!" with whatever was left over (smaller than the others).  I designed the decals on my Gypsy and sent her screen shots (taken with my phone) so she could approve them.  For "HAPPY" and "SMILE", I added a flower.

Here's the cutting mat with "FLOSS" taken off:


The mats go to 24", so you can imagine just how big these decals are.  I welded the letters so each word is in one piece.  Oh - I should say that these decals were cut using my Cricut Expression.

Here's a cutting mat with the leftover vinyl removed:


This past weekend, Kate and her husband put up all the decorations - pictures and the decals.

After putting the transfer tape on the top of the word, here's Kate's husband (with an appropriate T-shirt on) holding "HAPPY" up on the wall so Kate can approve the positioning:


Kate then peeled off the decal's backing (the transfer tape is only sticky enough for positioning) and posed for the camera:


then she stuck the decal on the wall and burnished it:


That's to make sure that the decal has a firm hold on the wall.  Here she is peeling off the transfer tape:


It's done and looks great!


Here are the other decals:


That "Tooth Fairy" picture to the right of "FLOSS" was drawn by Kate's daughter.  She's so talented!

That's it!  Oh, wait... where's "OPEN WIDE!"?  Look up:


Just a gentle reminder of what you're supposed to do when sitting in that chair!  :)

Kate said everyone loves her new room (including the decals)!  I'm so happy I played a part in that.

If you'd like to do something similar to your office or a room in your home, contact me at traci@creative-pursuits.biz.

Monday, January 20, 2014

Sun vinyl decal

I named my blog "Mix Me Up!" because I like to dabble in a bunch of different crafts.  That's also why I named my business "Creative Pursuits"; it doesn't tie me down to a specific product.  In addition to finished jewelry, kits, and tutorials, I also sell vinyl decals and magnets.  I use my Cricut to cut out the shapes, and for the decals I include transfer paper and instructions.  I discussed this technique in the Our "new" kitchen post.

Yesterday I got an order for a yellow sun decal.  I thought I had one cut, but I didn't.  I knew I had very little yellow vinyl remaining, and I got nervous that it would be too small or that the cut wouldn't work.  I have problems with that sometimes.  I had two sheets about 3.5" x 3.75", and the sun is ~2" x 2".  Another challenge was that one of the sheets had a small square cut out from when I made my decal board to show the shapes I carry and the available colors:


I used my Gypsy to plan out where the shape would go (click here if you'd like to see the Gypsy in action from when I put decals all over my toolbox).  I found I could cut two suns out of the same sheet, which ties in beautifully with the time-saving technique I discussed yesterday.

Here's one of the suns and what the vinyl sheet looked like after cutting.  The other is on its way to the customer:


If you're interested in any of the decals I offer, you can e-mail me at traci@creative-pursuits.biz for more information.  Let me know which shape and which color, and I'll let you know how much it is (either $2 or $3 for the shapes shown above).  If you'd like something else, let me know that, and I'll see if I can cut it for you.

Sunday, April 15, 2012

Re-Trained

Back in June, in my Time blog post, I not only complained about the lack of time and list numerous time quotes, I also showed you a train magnet I put on Steve's car.  His response at the time was unfavorable, but it grew on him.  Then one day he came home and said he was sad.  He had gone through the car wash, and the magnet had disappeared.  My friend Michele had the same thing happen to the peace sign magnet which was on her car.  I get around this by having the rain wash my car.  :)

So the time I was looking for back in June to remake the train magnet smaller finally came.  It took a while because I had numerous problems cutting.  I had designed and received approval for a smaller train with 3 passenger cars, and I had welded everything together so there would be just one cut.  However, the Cricut had other ideas and messed up the cut.  There was no reason for it.  I was watching like a hawk one time, and it just... messed up.

After the swearing, I decided to try cutting just the engine and coal car.  That cut fine.  Hmm.... I didn't have time to cut the passenger cars, so the engine and coal car went on the fridge.  Some time passed, and I finally cut the passenger cars.  That worked just fine.  Very odd.  Steve was carpooling, so I put the train on his car right before he got home.  He noticed it the next morning and is happy again!


I also cut a new peace sign for my friend and will be giving it to her tomorrow.

The moral of the story... take your magnets off before going through the car wash!  Also, don't cut such a huge welded item.  It won't work.

Tuesday, August 23, 2011

A study in opposites

Yeah, I blinked.  TWO months have passed since I last wrote.  How on earth did that happen?  Well, I've been extremely busy, that's how.  I submitted 6 classes for next year's Bead&Button Show, and I worked on some new products for my booth at Point's Fish Fry and a Flick.  I also made some minor changes in my website.  There's a calendar of events and a feed from my Facebook page.  The website design information is still there but off in a separate section available from the main menu.  More changes will be coming as I have time.

One big event that we did recently was the American Cancer Society's Relay for Life in Kenosha, Wisconsin on August 5th.  When I heard that a custom team banner would cost around $90, I said, "I can do it for much less than that!"  I also offered to create posterboards for the food we were selling.

I purchased a blank banner and some vinyl, and here's what I came up with for the team banner:


The width of the banner is 5 feet, and I think the height is around 3 feet.  Here's where the study in opposites comes in.  I put some of the beads I normally work with on the banner - not sewed on, just placed them on for picture taking.

Can't see them, can you?  Let's try this:


How about now?  No?


Ooh!  There they are!  The lighter ones are size 11/0 and the darker ones are 15/0.  Now look back at the first picture.  That gives you an idea of how different this project was than my usual work.

It was very awkward!  Steve helped me - he needed to.  Each word was far too long for me to work with on my own.  I am proud of how the banner turned out, and our team captain, my Aunt Nancy of the "Nancy's Angels", cried out, "Oh, Traci!"  She was pleased.  Yay!

Here are the food posterboards I made:


I was very pleased with them, too!  I used the Cricut and my Gypsy for all of this, of course.  The pineapple and grapes were not in my shapes.  I created the pineapple by modifying both parts of the strawberry - elongating each piece and even flipping the berry part.  The grapes are a bunch of circles stacked on top of each other.  The vine is from a different shape, and the highlights were added by Steve's X-Acto knife later.  Yes, that is the correct spelling.  My geeky husband just informed me of this.  :)


Here are a few pictures from the event:

My Mom at the food table (I do have to say that our table looked much better than most of the others):


Steve high-fives my Aunt Nancy and Mom during the Survivors' walk:
 

And here is Steve starting his time on the track:


They had a number of activities throughout the evening.  Steve took place in a cupcake eating contest.  I thought for sure he would win, but see the girl to the left of the woman in green, the grass skirt, and the coconut boobs?  Well, she won while Steve was still chewing the first cupcake.  It was quite impressive!


Late at night, here's our team campsite:


I think that's about it!  Our team has raised just over $3200, and the Kenosha event has raised over $300,00!  Just a drop in the bucket, but every drop helps keep people alive!


Monday, May 9, 2011

Car Decor

When I was a teenager my uncle owned a store called "Wal-Decor".  They sold paint, wallpaper, and all kinds of things to decor your walls.  My aunt and my mother worked there, and that is where Mom met John.  He worked as a painter/paper hanger with my uncle.  You'd think that some of that knowledge would have seeped into me, but I'm a very sucky painter, and I would never think of attempting to wallpaper anything.  However, I am good at putting other decorating touches onto things, as I've discussed in blog posts about stamping, my tool box, and our "new" kitchen.

When I got my new car a few weeks ago, I was nervous that I wouldn't be able to find it in the parking lot.  I've had Saturns for years and years, and I was worried I wouldn't know to look for a differently-shaped, differently-colored car.  Besides, the body of the car is metal, and after years and years of having plastic-bodied cars, I was itching to throw a magnet on it.

This is what I came up with:


Here I am with the car at Easter:


I love the look, even if my husband isn't too crazy about it, and my friends think the flowers are cute, too!  I have added the flowers to my Etsy shop so others can "Flower Power" their own cars.  Don't worry - this blog won't turn into Etsy-advertisement-central.  I just wanted to show off my new car and my cute flowers!

Friday, September 3, 2010

Our "new" kitchen!

It started well before Christmas, and it's all my Gypsy's fault.  For those who don't remember or who are new to my blog, the Gypsy is a design tool for the Cricut cutting machine that lets you plan out what you want to cut before you cut it.  I show it and my original Cricut (including a video!) in my A Gypsy-rific transformation blog post from June.

One of the benefits (or curses) of the Gypsy is that you can see all of the designs for all of the cartridges, not just the ones you own.  I say it's a curse because the number of cartridges I now have is about 4 times as many as I had before I got my Gypsy.  Now for the various mothers of mine who read this blog, we've found them cheap and/or on sale, so please don't fret.  There are a number of Gypsy owners who have far more cartridges than I have because they go "exploring" in their Gypsy.

I'm (slightly) digressing.  A few months before Christmas I was looking through the cartridges in my Gypsy and looked at "From My Kitchen".  I love scrapping family recipes, so I'm interested in anything I can use for future pages.  One of the features is a set of words relating to cooking such as "bake", "chill", "cut", etc...  They're put together in fun way (as you'll see in a little bit), and I instantly knew what I wanted to do - decorate the soffit or fascia or whatever the hangy-out part of the wall is called.  I showed my husband and explained what I wanted to do.  He thought it was a good idea and got me the cartridge for Christmas.

Fast forward 8 months, and we finally got around to washing the walls (yuck!) and painting the kitchen.  It was pretty boring and off-white, with curtains that had lots of little reddish flowers and leaves and vines and stuff.  We were not going to change the floor (green and off-white), so we picked two shades of green paint - the dark one for the soffit/fascia/hangy-out part and the light one for the rest of the walls.  We also found some easy-to-apply metal-ish sheets to use as a backsplash behind the stove.  I purchased beige vinyl from ExpressionsVinyl.com, which has a lot of colors and is pretty cheap.

So, a few days after we finally finished painting and put up the new curtains (the old ones were dry clean only for goodness sake, and they were dusty and covered in cat fur from Katy sitting on the shelf all the time, so we pitched them), I set to work on the vinyl.  I used the Gypsy and my new Expression (thanks again, Cyndy!) to maximize the size of the words and how many I could cut out of each sheet.  To get the words up on the wall without making a mess out of everything I used transfer tape.  It's still a little tricky, however.

The first step is cutting the words out on the Cricut, of course.  You can set the blade depth and pressure to cut the vinyl and not all the way through the backing.  That makes it much easier to remove the backing from the cutting mat.  I thought I wrote those settings down, but I can't find them now.  Practice first!  Pressure was around the middle, and I think the blade depth was 4, but please don't quote me on it.  I've used my Cricut since and changed the settings, so I can't look it up.

The next step is to take the backing off of the transfer tape and set it sticky side up on the table.  This step can be a bit frustrating because, well, it's sticky.  I ended up tucking a corner or two under to stick on the table.  That helped.

Then, you take the vinyl (including the backing) off of the cutting mat and put it backing side up on the transfer tape.  If you have multiple words or shapes on your mat, I recommend cutting them apart and working on one at a time.  With the tongue-depressor-looking-thing you get with the vinyl or transfer tape (I'm not sure if you get it from ExpressionsVinyl.com, though) or with a bone folder or credit card, burnish the vinyl to make sure it sticks onto the transfer tape.  Carefully peel off the backing.  If the vinyl comes with, put the backing back and burnish some more.  Then pick out the parts you don't need.  I recommend getting off your butt and going downstairs to get your Cricut tool kit instead of just using the scissors you brought to separate the words.  However, it can be done with just the scissors.  The Cricut tools are easier, of course.  You might want to practice first or make sure you have extra vinyl (I'll explain why later).

This is what you have when you're done and ready to put it on the wall:


If you're anal, you probably want to figure out the center of the wall where you want to put it, horizontally and vertically.  With the playfulness of these words, I didn't want to do that.  I wanted there to be some variation, and I'm just not that anal when it comes to stuff like this.  About other things, yes, but not this.

Stick it on the wall and burnish it again:


Then very carefully peel up the transfer tape.  If any of the vinyl comes with, put it back down and burnish again.

Before the big reveal....

One of the things we love about our house is its retro look.  It was built in the 50's and looks it.  There's light wood throughout and has lots of built-ins and cubbyholes.  The kitchen phone is still a rotary phone.  Steve wanted to replace it, but I thought it was too cute to remove.  The "From My Kitchen" cartridge has a retro feel to it, so when I planned out what I wanted to cut out of the vinyl, I included a number of images to go along with the words.  I could have used other cartridges, but I wanted to have everything "From My Kitchen".

However, images look better with more than one color, and I had only purchased beige and purple (Of course!  One can never have too much purple vinyl).  Steve had given me a lighter shade of purple and black vinyl, but none of those would go with the kitchen colors.  In my "I don't even want to go downstairs to get my Cricut tool kit" laziness, I did not feel like driving 25-30 minutes to Brookfield to get another color of vinyl.  I thought about where else I could get vinyl and remembered a sign store a block away on Appleton called Signs & Banners - Today!!.  I called them, and they had vinyl!  I walked over there after lunch and picked out a nice contrasting color.  While chatting with Neal, the owner, we discussed the possibility of me working on his website.  How cool is that?!

Armed with two colors, I now can cut and place images!  Here's one view of the kitchen with a number of words and images:


You know I mentioned before that things can get tricky and that you should practice or get extra vinyl?  That's supposed to be a strainer next to "strain":


I was going to piece together beige and brown so the beige would be prominent, but everything's so darned sticky, and I couldn't get it to lie right.  I was out of beige, so I cut another strainer out of the brown, but it had to be smaller based on the brown I had left.  Argh.  I used the "holes" from the original beige strainer, and it looks okay, kind of, but I'm not that happy with it.  I am going to get more beige and try again.  I thought I had bought plenty of beige, but I would have been happy with 2 more sheets.

Back to the reveals.  Almost everything indicates what that part of the kitchen holds.  It's not complete, of course.  That would look overloaded.  Besides, there's not a "Kraft Mac 'n Cheese" shape in the cartridge.  But I hit the basics.

Working around the kitchen to the left, next to the stove ("bake" and "cook") we have where the aprons are stored and a potholder (because I could not think of a thing from the cartridge that could go over the doorway to the rest of the house - anyone have any ideas?):


I think the apron's adorable:


Again - this is tricky because everything sticks to everything else.  The lace isn't perfect, and the pockets could be straighter, but unless you're going to look closely like you are now, you don't really notice it much.  I added the embellishments after it was on the wall - something else that's tricky, especially if you're short like I am.

Next to the doorway is the refrigerator, etc...


Yes, I labeled the clock.  Isn't that a cute retro clock?  It works with the rest of the kitchen so nicely!  Next to the toaster oven:


Now visitors can find the dishes and the silverware and the phone (as if they could miss it!).  Around the corner is the last of the vinyl:


The second color really makes a big difference!

One final picture for you - the other part of the kitchen with the new Katy-fur-resistant curtains and Miss Katy herself:


She'd really have to stretch to get her fur on those curtains!

All in all, even with the so-so strainer, I love the new look of the kitchen.  Yes, just painting and getting new curtains would have looked nice, but the vinyl accents make a huge difference in making it OUR kitchen, not just A kitchen, if that makes sense.

Let me at the rest of the house!

Monday, June 7, 2010

A Gypsy-rific transformation

A long, long time ago in a town not-extremely-far-away, a 12 year old girl made a metal toolbox, even though she was scared to death of the rivet machine.  It was Shop class in Junior High, and she was proud of her finished project.  A number of years later it was spray painted (purple, of course):


Yup, you guessed it - that girl was me.  I'm sure your first clue was that the toolbox was painted purple.  Second clue:  It's my blog.  :)

I know I've talked about the Cricut and the Gypsy a fair amount on this blog without any real explanation of what it is, so I thought I'd give you a quick description/demonstration using this toolbox and some purple vinyl Steve got me for Christmas.

The Cricuit is an electronic cutting machine.  You can cut shapes or letters out of paper based on what cartridges you have.  You plug the cartridge in, choose your shapes and what size you want them to be, then cut.

The Gypsy is a hand-held design tool that stores your cartridges and lets you design with any or all of them before you cut.  This is a huge paper saver, as you can plan where on the cutting mat the shapes will cut, and how big they will be.  Before the Gypsy, you had an idea of what the final size will be, but not necessarily how much paper you would need to cut the shapes out.  The Gypsy also lets you see ALL of the Cricut cartridges, not just those you've purchased.  This can be pretty dangerous.   (Oooh... THAT cartridge is cute!  Oh, look - if I had THAT cartridge I could decorate the kitchen!  {Steve got me that one for Christmas, but I have yet to decorate the kitchen.  All in good time!})

Here is a picture of the Gypsy's screen with a cutting mat filled up with shapes and letters:


As you can see, I filled it up pretty well.  If I'd really wanted to, I could have fit a few more shapes on it.  This project uses the following cartridges: Cuttin' Up, Designer's Calendar, George and Basic Shapes, Gypsy Font, Gypsy Wanderings, Gypsy Wanderings, Home Accents, Plantin SchoolBook, and Walk in My Garden.  Whew!  That's a lot.  I wanted a number of different kinds of simple-shaped flowers.

So, after the shapes are placed "just so" on the cutting mat, I plugged the Gypsy into the Cricut and let it cut.  Here's a video of it cutting with a surprise guest appearance:


I sure hope that works. It's my first video!

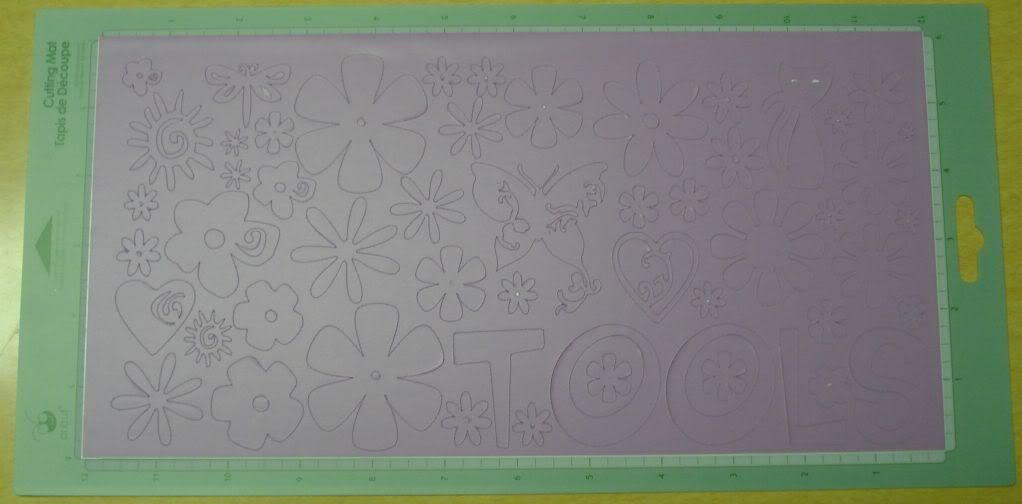
After the cutting is finished, here's what it looks like:


One thing about the Cricut is that very small pieces tend to not stay put on the mat:


This cut worked well, though, and I was able to get all the shapes plus a few hand-cut negatives onto my toolbox:


I think it's adorable, even if Steve thinks it's perfect for a 12 year old girl.  Yeah, back when I made this in 1983 or 1984 I would have LOVED it, just like I do now.