Showing posts with label purple. Show all posts

Thursday, June 26, 2014

Purple riveted bracelet

During the Make 'n Take event at the Art Glass and Bead Show in Madison this past March, I asked participants for ideas for next year.  Stitching can be a bit difficult for some people, so I'm always looking for alternatives.  Two people in two separate groups suggested riveting, and there were murmurs of approval and nods around the table.

At the show the next day, Steve bought me supplies to make my own riveted bracelet to see if I liked it enough to do it for the Make 'n Take.  When we realized I didn't have an appropriate punch, he bought me one of those at the Bead&Button Show.  Both the tool and all the riveting supplies came from Funky Hannah's.

Steve and I sat down tonight to make the bracelet.  Since Amanda from Funky Hannah's had told Steve how everything worked, he took the lead and placed the first rivet for the end piece that the clasp attaches to.

First he punched a hole:


Then he put the first part of the rivet in the bottom of the leather with the post sticking up:


He placed the component on top and snapped the other half of the rivet on:


Even though it snaps on, it's not secure until you tap on it with a hammer.  Here it is all finished:


Looks great!

Then it was my turn.  I put the clasp on using a snap clasp and split rings so I didn't have to worry about it falling off.  Yes, I used the Xuron split ring pliers!  We figured out how long the bracelet should be and trimmed the leather.  I had a really hard time punching the hole for the next rivet.  The tool is enormous, and I'm not very strong.  I was able to get the hole partially punched, but it took a few tries for me to get it all the way punched.  Steve ended up doing most of the rest of the punching.

Here I am about to tap the rivet in place for the other end component:


That's a special tool that goes on top of the rivet, and you tap on the other end with the hammer.

After the end pieces and clasp were in, we planned where the rest of the components would go:


I'm glad he bought me components with Celtic knots.  I've always loved them, but since I strongly identify with being German and may not have a drop of Irish blood in me, I always shied away from overtly Celtic things.  :)

We put the rest of the rivets in and glued flat-back crystals in place:


Those are my new Xuron bent nose tweezers.  Check back here tomorrow for my review!

Here's the final bracelet:


I think it turned out well!  Once we were comfortable with the process, the bracelet went quickly.  I think the whole thing took less than an hour, including planning, digging for a silver snap clasp, and swearing about my camera not focusing on the thing that's obviously in the middle of the frame.  (I really made a poor choice with this camera.)  I don't think I'm going to replace my stitching with riveting, but I already have a few ideas for incorporating the two.

Even before making the bracelet, I pretty much decided to not do this project for the Make 'n Take.  I'd have to buy a bunch of tools and supplies, and it wouldn't be cost effective for me to do it.  Also, none of my designs revolve around riveting, so it wouldn't bring people to my table during the show.  I've talked to someone else who might do it, though.  I now need to come up with something else, but I have plenty of time.

Have you done anything with riveting?  What do you think about it?  Send me a few pictures and a description of your project (riveting or anything) by 6/30/2014, and you'll be entered in my Xuron 4 in 1 Crimper tool giveaway.

Tune in tomorrow for the Xuron tweezers review and on Saturday for a guest post by Jill!

Wednesday, April 23, 2014

Might as well finish the set (purple wrapped loop necklace)

Monday I made earrings.  Yesterday I made a matching bracelet.  Today when I was contemplating what I would do, I had two options: try to finish the triangle bracelet or make the necklace that matched the earrings and bracelet.  Since I haven't quite figured out how to attach the clasp for the triangle bracelet (it really needs a name) and still have at least 4 more triangles to make, I decided to make the necklace.  Once I'm finished blogging, I'll get to work on designing the clasp mechanism so hopefully I can show you a finished bracelet tomorrow.

If you recall from yesterday, I had nine of those purple glass beads left.  There were five cylinders, three round ones, and one teardrop.  I couldn't be completely symmetrical with that count, but if I pretended that the teardrop was round, I could.  A teeny bit of asymmetry is nice every once in a while.  I found some small round beads that matched really well.  They're something between pink and purple and are transparent enough to blend in with the larger beads.


Yesterday I created the bracelet by starting with the clasp ends and working toward the center.  For the necklace, I knew what I wanted the middle bead to be, so I worked out from the center.  I interspersed a few of the small rounds between the bigger beads but remembered my mission was to use all of those purple glass beads.

Here's how it looked after a few segments:


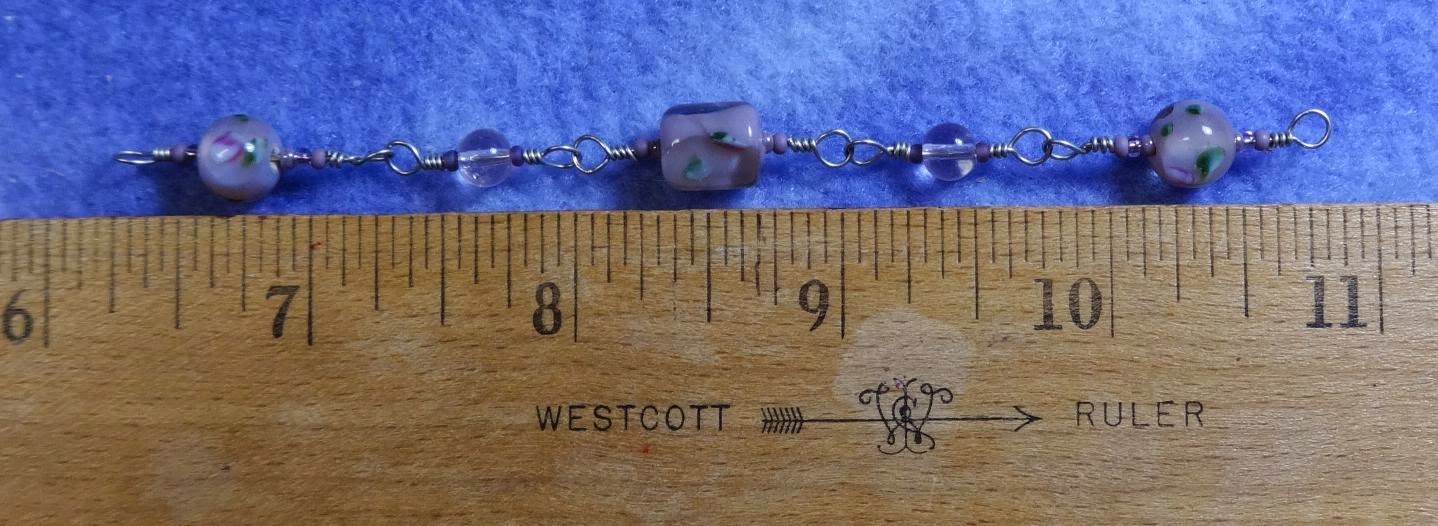
My necklace beading board is still missing, but my trusty ruler worked just fine for what I was doing.  I centered the bead at the 8.5" mark because I wanted the necklace to be around 17" before I added the clasp so the finished necklace would be around 18". 

Here's the entire finished necklace:


Here's a closeup of the middle bit on a lighter background:


Okay - now that those beads are used up, I'm going to go work on the triangle bracelet.  Sawtooth?  No, I just looked at sawtooth images.  The bracelet doesn't have that kind of slant.  It's more like a zigzagging zigzag.  Anyone have any ideas?  Leave a comment here, please!

Tuesday, April 22, 2014

Purple wrapped loop bracelet

Today's project is a bracelet to match yesterday's Purple trio earrings.

Yesterday I talked about dangling a string of the glass beads from wrapped loops.  I decided instead to cluster the beads on different lengths of headpins.  For today's bracelet I decided to follow that original plan.

Using the bracelet beading board I've talked about before, I made a few units and set them down to measure:


The last time I used the bracelet beading board was for the pink cube bracelet I donated to the Cinderella project.  I started in the middle for that bracelet and added beads to either side of the center bead.

For this bracelet, I decided to work from the outside in.  That way I could see what the length was with the clasp on and evaluate what I was going to do next with every unit added to each side.  My first attempt was just under 7", which seemed a little short to me.  I cut apart one unit, remade it, and added one more unit with the slightly smaller round bead:


The bracelet is a bit over 7.5" now, which should be a good length for sale.

Here's a closer look at the finished bracelet:


I should mention that I used the Groovy looping pliers to make the wrapped loops.  As I mentioned in my review, they are great to work with!

I talk a lot here about using up my old beads.  I was hoping there would be enough of these beads to make a matching necklace, but I only have 9 left.  I could make another bracelet (strung instead of with wrapped loops like this one), or I could take some other beads and make a necklace in the same style as this bracelet.  I think I'm going to make a necklace.  Even though I will put the pieces out for sale separately (instead of as a complete set), I like starting out with the option for someone to purchase all three pieces.

Monday, April 21, 2014

Purple trio earrings

Today was another rough day - I've had a really bad headache that just won't go away.  It's a little bit better than earlier, so I have hopes that in a few days I'll be my "normal" self again.

Instead of my usual "I feel like crap so I'm breaking out the One Step Looper for quick earrings", I decided to make some slightly more advanced earrings using wrapped loops.

Years and years ago I picked up these pretty purple glass beads with dainty roses in them.  They came in three shapes:


At first I had wanted to stack them with the cylinder on the bottom, the round one in the middle, and the teardrop on top.  I could do a wrapped loop for the bottom one, but the headpins I have aren't long enough for me to do wrapped loops on either end for the top and middle beads.  Instead of grabbing wire, I opted to stagger the lengths of the headpins:


That picture is a little dark, isn't it?  That was the best of about 15 pictures.  Argh.

I used 11/0 seed beads to add some color and to make sure that the longest headpins would be the same length and the medium-length headpins would be the same length.  If I had tried to eyeball it, the lengths would have been all over the place.

Friday, March 28, 2014

Purple dainty flower earrings

When looking through my supplies today, I found a vial of purple Thunder Polish 6mm crystals with only two left.  I was looking for a quick project for today, so this was perfect. I grabbed some purple Rizos, 11/0 seed beads, and 15/0 seed beads and made a pair of my "Dainty Flower Earrings":


If they look slightly familiar, it's because they're designed to go with my "It's Got Legs" and "Cobblestone Path" designs.

If you'd like the instructions, e-mail me at traci@creative-pursuits.biz for purchase information.

Monday, March 24, 2014

Sam Wescott's Super Duo Rosette bracelet

If you missed my mini tour of the Art Glass and Bead Show that I posted yesterday, click here.  There are so many neat vendors to meet!

I still don't have any entries for my Iliad-inspired earring challenge.  I hope that means you're busily working away!  In that post I requested that folks help me pay for the $25 prize and to help me continue blogging by clicking my ads.  I'm happy to say that I am over the threshold and should receive my first check next month.  Yay!  Thank you all so much!  I hope you're clicking because you're interested in the ads and not because I asked.  (But either way, I'm very happy.)


On to today's project.  Yup, you read the title right - I have made someone else's design.  When I was looking around Etsy and the 'net in general to make sure my newest designs (including the Waltz rope) weren't rip-offs, I came across a really pretty bracelet on Etsy by Sam Wescott called SuperDuo Rosette bracelet.  I sent her a message telling her that I really liked it, and by the time I was done complimenting her, I broke down:  "Okay, okay... you talked me into it. I'm going to buy it."

Her tutorial is a digital download and is only $5.  I was happy to pay it, and tonight I was finally able to sit down and make the bracelet.  The instructions were very easy to follow, although I did modify it slightly around the clasp (to make it face the way I wanted it to face) and to do a little reinforcing.  The diagrams were easy to understand, and it didn't take long before I was stitching without looking at the directions.

Over the weekend I bought some amethyst round beads that I was hoping would work with the design.  It calls for 3mm beads, but these were slightly bigger than that.  After a bunch of messing around and realizing I'd have to modify the pattern too much, I dug around until I found some 3mm beads.  They're faceted round, but they still work.


Since I was digging around, I'm not positive how thrilled I am with the colors.  The dark 15/0s on the outside are metallic amethyst gunmetal.  They're so pretty, and I've been wanting to use them in something.  I'm just not positive they mesh well with the white Super Duos and 11/0s.  Well, that's what I get for rushing to pick beads (I was antsy to get started).

I am still going to wear it, though.  It's a very dainty bracelet, and I could see wearing it on its own or with other bracelets of different but similar colors.  Because of how large my wrists are and the shape of my arms, I don't stack bracelets like a lot of women do, but I could with this one.

The embellishments on the outside are done after the bracelet is completed.  For an even slimmer version, that could be left off.  I almost didn't add the embellishments because I liked how delicate it looked without.  However, for this first one I wanted to make it as written.

I'm looking forward to going on quests to find the perfect 3mm round beads and the Super Duos and seed beads to go along with them.

If you'd like to make this bracelet, you can purchase the digital download here.  While you're there, check out the Wescott Jewelry shop, where there are some other tutorials and a lot of beautiful finished jewelry.

Thanks, Sam!

Tuesday, March 18, 2014

New Quadrille sample

When I was at the LBS retreat at the beginning of the month, I started a purple version of my Quadrille design:


I really loved the colors, but as you can see, I didn't have enough beads to finish the bracelet (in my size, that is).  I wanted this to be one of the colorways for my kits, but I couldn't find the 4mm beads that are in the curves in bulk.  Instead, I ordered some really pretty medium amethyst AB Thunder Polish crystals.

When they came in, I wasn't sure if they would look good with the other beads.  Tonight, I made a bracelet to see how they look:


They're a little subtle, but I think they're pretty.

In case you're wondering if I made the whole bracelet this time:


One reason I made the bracelet was to test the colors.  Other reasons include: purple (duh!), testing that my kits will have enough materials and Fireline, going over the tutorial another time, and so I had something to blog about tonight.  :)

Tomorrow I'm going to make earrings and samples of all the colorways.

The Madison Art Glass and Bead Show is in just a few days!  I sent out a newsletter about my involvement in the show and my other upcoming events.  Did you get it?  If not, click here to catch up on all the action (including where I'm teaching the above bracelet!), and click here to get on my mailing list.


Wednesday, January 29, 2014

Purple RAW bracelet

About a year and a half ago I posted this about a Right Angle Weave (RAW) set using wooden saucer beads and peanut beads.  Since then I've named it "Simple Stitched Saucer Set" because I seem to love alliteration.  I also have a "Double Decker Daisy", "Parenthetical Petals", and "Winter Wonderland".  I should have made all my designs alliterations.  I'll have to consider that for the future.

To refresh your memory, here's Simple Stitched Saucer Set in red and black:


I have kits for five colorways for this design, and I needed to make a purple bracelet for a super-secret-unless-you've-talked-to-me-recently reason.  I don't want to jinx it by posting it publicly.  Suffice it to say that I needed to make a purple bracelet, so last night while watching TV and the Cupcake kittens being born (live!) I made one big enough to fit me (because - PURPLE):


I have so many purple bracelets now that I need to grow extra arms (like in this movie) just to wear them.


It's been SO cold here in Milwaukee that I've taken to wearing my Snuggie in my studio, either in full "Snuggie" mode or as a blanket.  Currently it's sort of balled up in my lap.  When I get up, the Snuggie gets thrown on my chair.

The cats must be cold, too, because this is how I found Fe last night:


She wasn't completely "in-tented" as we call it - she LOVES being in "tents" - but she did a fair job of covering herself up!

Tuesday, December 10, 2013

Making a duct tape bag

Since I've done a lot of shows lately and have made a lot of jewelry, I thought I'd try something new and hopefully fun.  I've been eying the pretty duct tapes they have out now and have been wanting to experiment. I recently got a free ebook, Duct Tape Bags, and I thought that was the perfect opportunity to do my experimenting while I have a little down time between shows.  I'll review the book itself on Friday.

I'm going to write while I'm making the bag.  I don't think I've done that before, and I hope it'll be interesting for you.  I'll try not to make it too long.  :)

Here's the tape I bought:


No big surprise that it's purple.  Each roll was made by Scotch and was $3.99.  The purple is called "Violet Purple", and the cupcake one is called "Sweet Treat".  They're both 1.88" (48mm) wide, but the solid colors are 20 yards while the patterned rolls are 10 yards.  That means that I'll want to use the cupcakes sparingly.  The other reason I'll want to use them sparingly is that the cupcakes are at an angle.  I think they'd match up if I was very careful, but with sticky things I think that's hard to do.  Also, from what I've read in the book, when you make a duct tape sheet (also called "fabric"), you overlap the tape.  That wouldn't work well with the cupcakes.

The next step was deciding what kind of bag I wanted to make.  I have bunches of bags, and I really don't need another one.  I love bags, though, so I'll sacrifice and find room for one more.  I looked through the book (because if I'm reviewing it, I really should try one of the projects in the book), and two of them stood out - a simple purse with a flap, and a round purse with weaving at the base.  I like the shape of the purse with a flap, and I like the weaving, so I'm going to merge them.

Next, I needed to measure my current "casual" purse.  I like it, but I sometimes wish it was just a touch bigger.  So I got out everything needed to measure, and...

 Well, that's not helpful.  

Fortunately, Frisco didn't stay too long.  As much as I love him, I hope he doesn't come back when I'm actually making the purse.  I don't really want to try to cut duct tape off of him.  I should probably shut the doors.

I was able to get the measurements I needed for the purse, so I'm all set to go.  That grid-looking thing in the above picture is a glass cutting mat I've used with circle cutters.  I'm hoping that all sticky stuff will be confined to the mat and not my desk, and I should be able to cut on that pretty well.

And now it's time for... :::looks at clock::: ...lunch.  Crap.  Be right back!

Okay.  Lunch has been eaten, and the doors have been closed.  Back to work!  Oh, no... Pixel wants in.  Not going to happen.

I taped little flags to the bottom of the glass mat to the dimensions I want the front and back parts of the purse to be.  I'm hoping that will help the process go faster and to waste less tape.


Now to make the first piece of "fabric".  The instructions for the purse I'm making say to take strips of tape and put them sticky side to sticky side.  That double-sided strip is built on by sticking tape on either side with most of it hanging off.  I'm not going to take pictures of that whole process - it's in the book.

I can't believe this.  I've hurt myself ripping the first piece of tape off.  That stuff is harder to rip than I remember!  The tip of my forefinger hurts, and I think I bent back my thumbnail a little.  Ow.  I'm going to use scissors to cut the rest of the pieces.  That seems to be working well.  The scissors I'm using are EK Success's Cutter Bee Titanium scissors.  They have a non-stick coating, which is very helpful for a project like this one.  Even so, I do have to clean off some gunk from time to time.

Here's my first piece of "fabric":


There's only one wrinkle!  Considering how impossible it is to separate two pieces of duct tape (sticky side to sticky side, that is), I'm very happy with this.  That wrinkle will go on the inside.  It does need to be trimmed on the left and right sides, but it's just fine length-wise.  Having those little flags helped a bunch.

I next did the bottom and sides.  I reinforced the bottom with a few extra strips of tape.  Some of the bags in the book say to wrap pieces of cardboard for extra stability, but I didn't want that for this one.

Here's what I have so far - the front, the bottom, and both sides:


The hardest part so far has been the sticky factor.  When I'm positioning a piece of tape on the mat, I'm having a hard time getting my fingers unstuck while leaving the tape in place.  I've taken to nudging the side of the tape with my fingernails.  That's working fairly well.

I'm going to switch projects now and weave the flap.  I want about 5 inches so my stuff won't fall out.  Add 2.75" for the top, and I'll have to weave a piece 9" x 7.75".  The instructions say to make double-sided strips then weave them together.

That should be easy enough, except there will be a little math to determine how many strips of each I'll need.  The tape is 1.88" wide.  For the horizontal strips I need enough to be at least 7.75" high.  That works out to 4.12 strips.  Let's just make that 4 strips, so the vertical strips will need to be 7.52".  My handy dandy calculator says that works out to 4.78 strips.  Hmm.  I can't mess with the width now that I've already made all the other pieces.  Oops.  I should have started with the flap and adjusted the size of the bag accordingly.  No big deal.  I'll weave with 4 strips and wrap the edges with tape.  So I need 4 strips of 9" and 4 strips of 7.52".

I made strips, talked to my Dad, wove, adjusted the weaving to make the cupcakes a bit more centered, lined the back and wrapped tape around the edges to tack loose bits down and to give it a more finished look.  Here's my finished flap/top:


All these pictures make it look a lot more blue than it actually is.

Now for the back.  I made another piece of "fabric" with the same width as the first one but a little longer and taped the flap/top to it:


I added a stripe of cupcakes to each side strip then laid everything out for assembly:


Wow.  I should have started with a coin purse.  What I'd like to do is tape everything up on the inside and the outside, but I don't think that's going to work.  I don't think I should try turning it inside out (or outside in), and I wonder if I'll be able to tape on the inside once it's put together.  That might be a bit tricky.

Better stop procrastinating and get going.  What's that sound?  Steve's home already?  Where did the afternoon go?  Oh, that's right - I got distracted a few times during the afternoon with e-mail, Facebook, and listing an item on Etsy before it gets too late in the holiday season.  It's really a wonder I get anything done.

I got the bottom parts all taped up on the inside and outside.  At some point I realized I had the flap with the cupcakes facing the wrong way, but I was able to take the tape off and turn it around.  I hope that doesn't mean that the purse will fall apart with the first stiff breeze.

Here's what I have after taping all the bottom bits together:


We left one of the doors open as I was taping the sides up and...


Well, that didn't take long.  Steve shooed Pixel out, and I was able to keep working.  Not for long, though, because dinner was ready.

After dinner, I finished taping the purse up.  That was really hard.  While the pieces are fairly rigid, they do sag somewhat.  Steve helped me hold the pieces together on a few of the joins, and that helped.  If I do this again, I will make it around a hardcover book.  That should help with this part of the process.

Here it is fully assembled, sans strap:


I was able to tape the insides.  As I figured, it wasn't easy, but I really needed to make sure that everything was reinforced.  I could see light in a few of the corners, so I took little squares of tape and kinda smooshed them in the corners.  Not the most elegant solution, but hopefully it'll work.

The strap was quite a doozy.  I like my purses to go across my body to keep my hands free, so that meant a VERY long strip of duct tape.  No, that meant TWO very long strips of duct tape stuck together with one of the strips on the outsides of the purse body and the other on the insides.  Steve and I had a devil of a time getting them to align correctly, and there are some wrinkles.  I'm not happy with that, but it couldn't be helped.  Since there were many areas of sticky on the edges, I wrapped tape around on both sides, trying to align the cupcakes.  It worked most of the time.

So here's the completed purse, close up and with me wearing it:


It turned out big enough that I can carry my iPad in it plus a number of other things.  I used an entire roll of the purple tape and quite a bit of the cupcakes.  I might have enough to make that coin purse I mentioned before.

I think it's cute, but it will probably be a while before I make anything of this magnitude again.  It gets a little frustrating to have the tape sticking everywhere but where you want it to go, and it was difficult to cut a straight line.  I'd also like some way to keep the flap down.  I have a few ideas.

Have you made anything with duct tape?  If so, e-mail me a picture (and what you thought of the process) at traci@creative-pursuits.biz, and I'll post it here!


Tuesday, September 10, 2013

My new code name and why you want to know it

For the last three Tuesdays I've been talking about the Colorfully Modern Cardigan that I'm crocheting.  It's the Lion Brand Fall 2013 Crochet-Along, and I've been having a lot of fun making it knowing that there's a bunch of people doing it at the same time.  If you've missed my posts (and pictures of Frisco, our kitten), click here and read from bottom up.  If you don't read from bottom up, you'll wonder why the sweater keeps getting smaller.

The one thing I have not enjoyed is finding the yarn.  I have ranted about the dreaded dye lot and how for the yarn I've chosen there seems to be two factions: high variegation contrast and low variegation contrast.  I have gone to four Michaels in the area, and I've gotten confused on who had what, especially if I've purchased all high contrast balls from them.

Last week I had a doctor's visit (a routine visit - nothing to worry about!), so since I'm lazy I like to group errands, I decided to call the Michaels closest to the doctor's office to see if they had the yarn.  I talked with Kris, and we tried to figure out if they had high or low contrast, and she said it seemed pretty high.  I decided to take a chance and check it out.  I brought along a wad of yarn so I could compare.

I was pleasantly surprised when all 5 balls belonged to the right faction.  One of them didn't have a wrapper, and I was curious if it was the same amount of yarn as the other balls.  It just looked smaller, but that could have been because Vanna White's face wasn't staring out at me.

Someone located Kris for me, and I have to say she looked stunning in a Halloween-themed hat.  It was a little thing, jauntily perched on her head, and I declared it was adorable and must be a fascinator (here are images of other fascinators).

We chatted about the yarn and about the Crochet-Along, and I gave her my card in case she wanted to read my blog and see pictures of the cardigan and of Frisco.  Hi, Kris!  If you're reading this, please send me a picture of you in that fascinator at traci@creative-pursuits.biz, and I'll post it here.

I asked about the wrapper-less yarn and if it was a full ball.  She said it should be, but she could take 10% off for damaged goods just in case.  I thought that was great, and she called up to the cashier, Amanda, to ask her to take the discount off.  She said it was Vanna's Choice purple.  "Well, purple mist, but you don't really need to know that."  Kris's little aside was just like something I would say!

I wandered around a little bit more then went up to check out.  I walked up to the cashier and asked if she was Amanda.  She said she was, and I said, "I am Purple Mist."  Then I laughed and said, "That sounds like a code name!"  Amanda agreed, and we decided that Purple Mist would now be my code name.

Since I seem to be prone to daydreams lately, I had one where I was a super hero called Purple Mist.  I carried a spritzer of lavender essential oil, and I sprayed bad guys with it so they'd calm down and stop being all mean and villainous.  I also envisioned myself being a lot slimmer so I wouldn't look like an eggplant in my purple spandex outfit.

There's no sense having a code name if it's not good for anything, so I am instituting a new discount program:
  • Anyone coming to any of my shows (craft shows or bead shows) who calls me "Purple Mist" or works "Purple Mist" into conversation (for example, "Did you see the purple mist in last night's sunset?") will get 20% off their purchase.
     
  • If you take a class with me where I'm selling supplies, the same thing applies.  I really didn't mean for that rhyme; that seems to happen all the time.  I can't take 20% off of class fees or kits, but I can on extra purchases.
     
  • Also, there is a coupon code on Etsy, PURPLEMIST, which can be used for 20% off anything in my store.
This discount program and Etsy coupon code is good until my 100th birthday, 8/22/2071.  If I happen to live that long, I'm sure by that point I'll just give you the stuff to get it out of my house.  Don't wait until then, though - all the good stuff will be gone.


Crochet-Along update:

Since I last updated you, I have finished the back and crocheted the two pocket linings, and I've started on the left front panel.

This left front has been a bit of a trial.  First I crocheted far too loosely, and after three rows I determined it was huge.  Ripped it out and started it again really tight.  I loosened up as I went, and after about ten rows it looked like an isosceles trapezoid (upside down from the one pictured here), and I ripped it out again.  The third time was the charm, but I am a little concerned it's going to be too big.

I then added the pocket where it was supposed to be, but then I ended up ripping it out and adding it lower.  Since I'm very short, I didn't want the cardigan to be as long as they suggested.  It would have ended up down to my knees, which is not a good look for me.  So after I added the pocket and did ten more rows, I decided that the pocket would probably be up by my ribs, which is also not a good look for me ("You kids get offa my lawn and stop throwing Cognac bottles in it!" Yes, we recently picked up many pieces of Cognac bottle from our yard.).  I ripped out the ten rows after the pocket and another six or so rows before re-adding the pocket.

Fortunately I've been taking copious notes in the pattern using knitCompanion (if you missed my review of that app, check it out here) so for the right front and for subsequent sweaters I know just what to do.

A bunch of people on the Ravelry discussion group expressed concern about the pockets.  They were having all sorts of trouble with them, so I got concerned that I would have problems, too.  I had this vision in my head of me trying to crochet into air to have a gap where the pocket was, and how on earth was I to do that?  There was nothing in the instructions or in Lion Brand's blog post discussing the pocket that explained how to crochet into air for 17 stitches.  It didn't say to chain 17 stitches then pick up on the other side and crochet into that 17-stitch chain on the next row.  Nothing like that.  I assumed that there would be a gap up and down where the pocket was.  Left-to-right: no problem.  Up-and-down: air.  I knew I was crocheting on the pocket lining but just couldn't figure out what to do after that.

After I took some time to think about it, I felt utterly stupid.  When joining the pocket you crochet the front panel for 10 stitches then crochet across the pocket lining (skipping the first and last stitches of the lining so there's overlap).  Then you skip 17 stitches of the front panel and crochet the remaining stitches on the other side of the front panel.  There are two join points - one at either end of the pocket lining.  For subsequent rows, you just keep crocheting.  The gap in the front panel is the opening to the pocket, and by crocheting on top of the pocket lining, that becomes the front panel.  The only tricky thing was adding the ribbing in the right place, but I didn't have any problems with that.  The rest of the pocket is sewn on after everything is done.

Everything's easy once you know how, huh?

I tried to get Frisco to demonstrate the pocket, but he was being uncooperative.


I stopped trying after he pulled on a few loops of the pocket opening.  Oops!  I guess I won't do that again.  Fortunately the loops weren't very big.

Tuesday, August 20, 2013

Future project: Lion Brand's Fall Crochet-Along

A while ago I signed up to receive the "Weekly Stitch" e-mails from Lion Brand Yarn.  They give excerpts of some articles (one that was really funny was about school subjects being related to yarn and knitting called A-B-C-K-2-P-2 by Franklin Habit).  There are sales, and they always highlight some of their free patterns available on their website.  Also, there are links to what's on their blog, the Lion Brand Notebook.  There's more to the e-mails than that, but you get the idea.

It was in one of these e-mails that I first read about the Crochet-Alongs that Lion Brand holds.  Now, I'm not really one for group crochetings or knittings or readings or anything where I have to go along with the crowd, but I took a look at the projects.  One was a shrug - nah... I'm not fond of shrugs.  Another was a top-down jacket.  That one had potential, but it was striped (horizontally - ugh!) and only went to the waist.  The sleeves were to the elbow which is a nice length.  The third one... it was also a jacket, but it was long, had sleeves just past the elbows, and had pockets.  It looked loose, whereas the other jacket looked kind of rigid.  It looked like there were stripes, but they were more subtle than the other jacket, and stripes can be omitted.  The texture of the jacket would give visual interest, so a solid or variegated yarn would work just fine.

In short, I was enamored with this jacket and would make it no matter what.  It was just a matter of when.  I voted (along with over 20,000 other people), and the one I liked loved won!

 Isn't it purdy?

Click on the picture to be taken to the announcement post with all the relevant links and stuff.

Still, I wasn't sure if I was keen on doing a Crochet-Along.  When would I be able to afford the yarn, and would I have the time?

My birthday is this week, and in the mail came a Michaels gift card from Steve's parents that would more than cover the cost of the yarn.  Thanks, Mama and Papa!

The pattern calls for the new Unique yarn in a number of colors along with some stripes of Vanna's Choice yarn.  Some people asked about what yarn to use if they don't want stripes, and they recommended using Vanna's Choice.  Unique is a chunky yarn, and Vanna's Choice is a worsted weight - slightly thinner than Unique.  What I found interesting is that the pattern calls for different weights of yarns to be used in different rows.  That's typically not done.  I decided to use all Vanna's Choice, so the resulting jacket should be a little lacier, which is exactly what I want.  Perfect for chilly Loose Bead Society meetings or movie theaters.

Yes, the Vanna from Vanna's Choice is Vanna White from Wheel of Fortune.  She is quite the knitter and crocheter and has books of patterns as well as yarns named after her.  I have her Vanna's Afghans A to Z: 52 Crochet Favorites.  I haven't made anything from it yet, but there's one in there with cats on it, so it's only a matter of time.

The last thing I needed was a partner in crime.  Mom and John were over on Sunday, and I told them about the Crochet-Along and showed them the picture.  I thought it would be neat if Mom and I could crochet the same jacket at the same time.  She's going to be in the hospital for three weeks pretty soon for cancer treatment, and I thought it would be fun for us to Skype and show our progress.  It took some convincing because Mom has never crocheted a sweater before, but she gave in after only a little guilt-tripping.  So she couldn't back out, I showed her the yarns recommended for crocheting it without the stripes, and once she picked one, we ordered it from the JoAnn website to be shipped here (since she won't be home this week for medical procedures, either).  Hopefully the yarn will come before she goes in the hospital.  She'll be in Chicago, and I'm in Milwaukee, so I won't be able to just run it over.


Now that I've gotten Mom roped in I needed to get my own yarn.  JoAnn's had a sale on Vanna's Choice for $2.99 a skein (normally $3.99).  I saw a Michaels ad online that had it on sale for the same price.  They unfortunately don't have online ordering, so I called a store near last night's chilly Loose Bead Society meeting, but they only had 5 skeins of the color I wanted.  Other stores in the area have it, and I was pleased that there's no dye lot, meaning I can get the yarn from any store at any time, and it should all match.

Dye lot is a funny thing.  You would think that they would determine that "3R 1G 4B" would be the formula for a particular color and that would be the color forever and ever (amen).  However, I have seen some vast differences in colors for the same yarn (I can't say "exact same yarn" like I want to because it bugs Steve. :::grin:::).  I've seen this in scrapbook paper and beads, too.  What you need to do is buy at least as much as you need for your project at the same time to make sure it all matches.  If you're at the store buying the yarn, check the dye lot on each skein before throwing it into the cart.  Better safe than ACK! There's a big dark stripe right over my BOOBS!  How did that HAPPEN?!?

Update: See the end of the post for more on dye lots.

I went to Michaels last night after the chilly Loose Bead Society meeting with my friend Amy (who drove), and the yarn was not on sale.  I was perplexed, but Amy checked it out while I was in the hook aisle trying to find the elusive "O" hook (one bigger than the "N" hook the pattern calls for because I crochet tightly).  Turns out there is no "O" hook, so I'll have to use the "P" hook I think I already have.  The sale starts next week, so I bought 1 (one) skein using my 40% off coupon.  That will keep me busy for a little bit, and I'll either buy more next week when it's on sale or keep getting one at a time using 40% off coupons to save 40 cents or so on each skein off of next week's sale price.  Anything to milk that gift card!

Are you ready to see the color?  It's going to be a HUGE surprise...

Purple Mist!

I looked at other colors.  Really, I did.  I wanted a variegated yarn, so that limited the choices.  I decided I don't want anything too dark (I have a lot of that) or too bright (which just doesn't work for me), so the choices were even more limited.  Browns and tangerines are right out (shudder), so I was left with Denim Mist, Rose Mist, Seaspray Mist (light green), and Purple Mist.  It had to be purple.  Of course.

If I do it again I'll choose a different color.  Really... I will!

Mom chose Vanilla Twist:


That should be pretty!

When I was looking at the yarn in the store it looked positively rope-like to me.  Much thicker than I expected a worsted weight to be.  Later, I realized that the last few projects I've knitted (including the train baby hat) have been with sock (super fine) yarn.  Worsted weight is marked as a "4", and the sock yarn is marked as a "1".

Here are the two yarns next to each other:


I'm going to have quite an adjustment to make when I start working on the jacket!

As for the time I was concerned about having, my summer season is winding down.  I have a few more farmers markets to go to, but those don't need any more preparation at this point.  I've decided that daytime should be spent on the business (writing blogs and designing and bookkeeping and stuff like that) and at night I can knit or crochet or do nothing.  We'll see how that works out.

Now that I'm in, I will be posting periodic updates to my progress.  I may wait until Mom gets her yarn.  If anyone else wants to join in, I'd love to post pictures of your progress, too!  E-mail me at traci@creative-pursuits.biz and let me know you'll be crocheting along.

If you're on Ravelry (my name is taotte there - look me up!), there's a group for discussions and updates on this Crochet-Along.  It can be found here.  I'll be bopping in there from time to time to see how other folks are doing.

Yes, I'm aware I still have that damnable hooded cardigan to finish, but that will take forever.  Yes, I'm aware that it will take forever if I never knit on it, but that's a topic for another day.

Update:  I knew it was too good to be true.  There is a dye lot on the Purple Mist Vanna's Choice yarn.

Steve and I had to drop off my car at an auto body shop because some nimrod scraped along the driver's side while I was blissfully unaware in the grocery store.  Both doors have scratches and minor dents, and it's quite possible that it'll rust if it's not fixed.  I'm doing all the follow-up stuff to get it reported, and hopefully the culprit will be found (there's a tape at the grocery store) and will pay up so I will get my $500 deductible back.  Anyway - we were near another Michaels store, so I thought we'd use the 40% off coupon on Steve's phone to get another skein of yarn.  I was quite surprised (and dismayed) that there were dye lots listed on all of the skeins there (except for the two that were missing labels, of course).  There were 4-5 dye lots represented, and some had a more bold variegation than others.  I tried to remember what I had at home, and we picked one of the bold ones.


There is a very slight difference - the one on the bottom is a little bolder - but I don't think it'll be too noticeable.  The problem is that they only had about five skeins of this dye lot or others that looked close enough.  I'm going to need 16 skeins total.  My dreams of picking up a skein here and there as I needed it have unraveled like a badly crocheted sweater.  The only thing I can do is to go back next week when the yarn is on sale and pick up as many skeins as look right and hope that I can find more later.  I'll keep you posted!

Monday, August 20, 2012

More RAW with those saucers

A while back I posted a few blogs about saucer beads (see Red and Black part 1 and part 2 if you missed it).  I really liked the look of the bracelet, earrings, and necklace, so I decided to make more sets.  I found that the strands did not have the same number of beads, so there was some adjusting to be done on the necklaces.  Then I dropped three of the purple ones and couldn't find two of them.  I don't know how because they're pretty large, but they're gone.  Surprisingly, I found the one red saucer bead I had lost in a bin I use for displays.  Now I have two of them left and can make simple earrings.

To refresh your memory, here's the red and black set:


The second set I made was with purple saucers and color-lined purple peanut beads:


The third set was with lime green saucers and color-lined pink peanut beads:


I love how the same types of beads (saucers and peanuts) made in the same stitch (right angle weave) have such a different look just by playing with color.  The red and black is classic, the purple set is sophisticated with that bit of shine, and the lime green and pink is playful.  The lime green and pink set sold at the art fair I talked about yesterday.

There is one strand of saucers left - orchid.  I'm going to try them with gunmetal peanut beads and see how that looks.

One more thing for today.  If you look closely you can see a slight variation in the earrings:

One of these things is not like the others

Can you see it?  The red and green ones look slightly more "portrait" than the purple ones do.  I believe it was because on the purple ones I went from the outside of the peanuts that are surrounding the top saucer instead of from the inside.  Fortunately I noticed this before making the second earring.  Something to keep in mind if you're going to try this technique.  I like the longer look rather than the squatter look, but they're still pretty.

That's it for today!  I can't wait until the next Rings 'n Things sale (September 12th in Milwaukee!) so I can get more strands of these beads!  I definitely need another strand of red and lime green.  I passed on dark blue last time - I won't make that mistake again!  I have some gorgeous color-lined blue peanuts that will look fabulous with them....  I'm all twitterpated now.