Monday, August 27, 2012

Tool Review: Xuron "Fireline scissors"


Background 


The day after the Bead&Button Show in 2011, The Beadin' Path gave a presentation to the Loose Bead Society (you can see photos from that presentation here).  We met Heather DeSimone, Elisa Sullivan, and Ashley Bunting.  Nice ladies, and they brought a bunch of wonderful things.  I'm friends with them on Facebook so I could tag them in the LBS pics, and it's nice to see what they're up to.

Fast forward to the Bead&Button Show this year.  I saw Ashley there - I think it was at the Meet the Teachers event - and she told me she was with Xuron now.  (Did she post that on Facebook?  I need to read more closely!)

I was surprised to get an e-mail from Ashley shortly after the Show.  She said she saw my item in Bead&Button in the Twin bead challenge (check it out here) and noticed that I used Fireline for my beading thread.  She told me about the Xuron 9180 High Durability Scissors, also called Fireline scissors, and a little about the company.  She offered to send a sample of the scissors for me to try out.  Here's a video of her using the scissors.  They are engineered to never dull, so instantly I was interested.

I told Steve about it, and as soon as I mentioned Xuron he said, "Xuron?  Yeah, they make good tools.  I have rail nippers that cut clean every time."  With that endorsement and Ashley's offer, how could I refuse?

I love using Fireline.  It doesn't fall out of my needle (I've had that problem with K.O. and Nymo), it doesn't need waxing, and my pieces feel secure.  However, Fireline does quickly dull scissors.  You start like this:


Then to save your blades, you switch to this:


That gives a fairly sharp cut, but it's not very precise.

I know a number of people who buy dollar store scissors to use just with Fireline.  When they get dull, they're tossed.  I've been using my scrapbook scissors.  I know I shouldn't, but they're handy.

The unveiling


In short order, my new Fireline scissors arrived:

Not actual size  :)

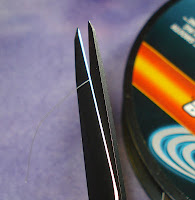
Yup - they're more like pliers than scissors.  They're a bit larger than I'm used to, but it's not bad.  One edge is serrated and one is smooth:

Larger than actual size

The scissors have a Micro-Shear (R) by-pass cutting method which, according to Xuron, "reduces effort and extends tool life as the cutting blades do not meet edge to edge."

Much larger than actual size

Here's an "action" shot:


The actual "review" 


So how well do they cut?  I used one of my scrapbook scissors and cut in the "normal" way (not all the way down), and those cuts are on the left in the below picture.  The Fireline scissors cuts are on the right:


The cuts are clean and crisp every time.  There are no little fibers that will stick up from your piece that are near-to-impossible to hack off (I've had that problem more often than I'd like to admit).  Flatten the edge a little in between the teeth or fingernails, and zip! it slides right into the eye of a needle.

The one thing I will say is that the blades are pretty thick, so it may be a little difficult to get super close in to the beadwork.  However, I've used them on a few projects so far and haven't noticed a problem.  They are sharp all the way to the tips, so you should be able to get pretty close.

Where to find them


Now that you're all excited, I bet you want to know where you can find them.  If you do a Google search, you'll find a number of references to "Kevlar fiber shear" or other names.  They're the same scissors - they cut Kevlar as well as Fireline and other high strength beading threads.  I even saw a few references to tennis racket restringing.  As long as you see "Xuron 9180", they're the right scissors.

This is not going to be the case with every tool I review, but I sell the Fireline scissors along with the 4 in 1 Crimper and split ring pliers.  You can find them at any bead show I go to (see my website for my calendar) or on my Xuron tool shop page for $25 plus $3 shipping.  You can find them cheaper elsewhere, but you'll have my undying gratitude, and if there are any problems with the tool, I have a direct line to Xuron.

The bottom line 


So, if I hadn't gotten these free from Xuron (thanks, Ashley!), would I pay $20-25 for a pair of scissors?  Yes, I would.

I like to get tools that solve a problem that has irritated me for quite some time.  The screen protector on my cell phone constantly had air bubbles and looked horrible.  It bothered me every time I used my phone, which is practically all the time, so I was constantly irritated.  I found a place that had a highly durable screen protector that cost more than a normal one, but there would be no air bubbles and no dust underneath that causes a little bubble.  Yes, it cost a bit more, but now I don't have to think about it again.  In my studio I've mentioned the magnetic tool rack I recently got for my pliers.  That was only $4 (woohoo!), but that solved the problem of keeping my pliers in order and out of the jumble that ended up on my desk.

If you work with Fireline, you know how quickly it can dull scissors.  You've likely had frayed ends that were difficult to thread into a needle and that stuck out from your work.  It's a problem that you face each time you bead.  If you'd like to focus more on the beading and less on the cutting, give these scissors a try.

Now that I've earned my sample, I think it's time to get back to beading!
Thursday, August 23, 2012

Guest blogger: My husband (again)!
For a number of years now I have been wanting new earring racks.  The first one I bought was a tall three-sided plastic one that liked to tip over in the wind, if it was brushed against, or if it was sneezed at.  I bought a few cube earring racks last year at the Loose Bead Society rummage sale but didn't like them, either.  They were also plastic but with metal rods on the ends.  They weren't want I really wanted, but they were cheap.  After using them for a season, I decided I wanted to upgrade before the art fair I wrote about on Sunday.  One night my insomnia kicked in, and I ended up looking online for possible solutions.  I wanted wood or metal, and it had to be large enough to hold earrings on my new earring cards:


They're business cards printed vertically with earring card adapters stuck on the backs.

I was finally able to find something close to what I wanted on Etsy, but each rack was around $90 (plus shipping), and was only 8"x8".  Way out of my price range, and it wouldn't hold any where near what I needed.

So I got my thinking cap on and went to Home Depot with Steve.  While I knew he could make what I wanted out of raw wood, I wanted it as easy and as quick as possible.  We didn't find anything that day, but I kept thinking about it.  What could be done with as little work and cost as possible?  One night on my way home from a meeting I stopped at a Michael's that has a Home Depot next door.  I picked up some supplies - mainly those I had thought about but with a few changes - and thrust them at Steve.  "I trust you!" I said.  Here is what he came up with:

Oh - there aren't as many pictures as I would like because the first rack he was testing, and he got all ambitious to make the second one while I wasn't home.  I got what I could, but an astute woodworker should be able to figure it out based on the descriptions and a few pictures.
Though we looked at different sizes of lumber for the basic structure of the jewelry racks, good lumber looked to be too expensive. Traci found a solution in a milled rectangular wooden plaque (6"x9" by ArtMinds) sold by Michael's. The plaques weren't square, but Traci decided she could live with an earring rack that was narrower in one direction than the other. So while I was still trying to think of feasible designs, Traci showed up with a bag of plaques, a couple of lazy-Susan bearings, several lengths of 1/2" square molding, and a fistful of 3/16" dowels. This pretty much solidified my thoughts.
I cut the 3-foot-long molding in half, making eight 18" lengths. Four would form the corner posts of each rack. I measured the length of the business cards Traci was using for earring cards, and decided the rails they would hang from should be spaced 3.5" apart. Since 5 x 3.5 = 17.5, just under the length of my posts, this would work fine. I would stagger the dowels slightly on adjacent sides so they wouldn't intersect each other within the posts.
I marked one rail with 3.5" increments starting 1/2" from the top on one side, and starting 3/4" from the top on the next side (not the opposite side, but 90 degrees from the first). I then clamped four square rails together in a 2 x 2 square, to ensure that the holes would line up from one side to the other, and drilled 3/16" holes through all four rails. (The first time I did this, the bit splintered the wood slightly as it broke through the other side; I sanded them as smooth as I could, and faced those surfaces in. For the next one, though, I put the rails on a piece of scrap wood and drilled into it to keep the holes clean.) Each post was drilled through five times in one direction, 3.5" apart, and five more times, slightly below and 90 degrees rotated from those holes.
I wanted the racks to have no visible hardware holding them together, so screws were out. I decided to glue them together using bits of my 3/16" dowels to strengthen the joints. I placed two plaques on top of each other, back to back, and measured the thickness. I then used a piece of tape to mark my 3/16" drill bit so I could drill through one and part-way into the other without breaking through. I marked where a corner post would fall on the top (beveled) side of the plaque that would become the bottom of the rack and drilled into the center of that square, through that plaque and partly into the bottom of the top plaque, situated upside-down under it. This alignment guaranteed the posts would be aligned vertically. I then drilled matching holes in the top and bottom of my posts for alignment dowels. I cut short pieces of dowel, glued them into the ends of the posts, then put glue in the holes in the plaques and pushed them together, making sure the holes in the posts matched their mates on the other side (high on the narrow side, low on the wide side). I weighted the racks under a carefully balanced stack of magazines while I let the glue thoroughly dry.
The next step was the dowel rails. I found the dowels fit the holes snugly enough that they didn't need glue. I pushed them in place, marked the length with a nick from my razor saw, then backed them out slightly, sawed them off, and pushed them back in place. As opposed to measuring the dowels, this technique guaranteed that even if the distance between the posts varied, the dowel ends would lie flush. I sanded them lightly to make them smooth.

(This is when I got home)

Next, I added the bearing that would let them spin freely.
For those of you who will be looking for this...
Traci had originally bought only four plaques, thinking the rack would stand on the bottom plate of the bearing. Instead, after measuring carefully to ensure it would be centered, I used short, flat-headed wood screws to attach another plaque to the bottom, so the rack stands on a sandwich of two plaques with the bearing between. This made the rack more stable and less likely to scratch any table it would be placed on. This meant Traci had to go buy two more plaques before I could build the second rack. (Yay!  Back to Michael's!)


Once both were complete, I finished them with a combined stain/polyurethane product. Since we don't have paint thinner, I used a cheap foam paintbrush. This was clumsy and difficult, compared to a good paintbrush, but since I don't want to have to deal with properly disposing of the thinner (it's toxic), with a foam brush I could just let it air dry and throw it away.
One of the bearings doesn't rotate as easily as the other, but that aside, the new racks worked and looked great. Don't tell Traci, but I'm already trying to think of other things I could build to showcase bracelets, necklaces, and rings. Oops, cat's out of the bag. (Who would put a cat in a bag?  That's just crazy talk!)

Here are the racks at last weekend's show:


The narrow sides can hold two cards across, and the wide ends can hold three.  Since I didn't bring my cheaper jewelry I had space to put bracelets.

I should mention that I spent around $20 for each earring rack.  If I had been patient, I would have stopped at Michael's every time I passed one and used a 40% off coupon each time.  The plaques aren't that expensive, though, and I was anxious to get going.

I'm very curious about what else Steve has in mind!  My main bracelet holder is a three-tiered thing that in general I like but is SO bulky to store and bring to shows.  Besides, it's black and doesn't match my new wonderful racks.  Thanks, honey!

Monday, August 20, 2012

More RAW with those saucers

A while back I posted a few blogs about saucer beads (see Red and Black part 1 and part 2 if you missed it).  I really liked the look of the bracelet, earrings, and necklace, so I decided to make more sets.  I found that the strands did not have the same number of beads, so there was some adjusting to be done on the necklaces.  Then I dropped three of the purple ones and couldn't find two of them.  I don't know how because they're pretty large, but they're gone.  Surprisingly, I found the one red saucer bead I had lost in a bin I use for displays.  Now I have two of them left and can make simple earrings.

To refresh your memory, here's the red and black set:


The second set I made was with purple saucers and color-lined purple peanut beads:


The third set was with lime green saucers and color-lined pink peanut beads:


I love how the same types of beads (saucers and peanuts) made in the same stitch (right angle weave) have such a different look just by playing with color.  The red and black is classic, the purple set is sophisticated with that bit of shine, and the lime green and pink is playful.  The lime green and pink set sold at the art fair I talked about yesterday.

There is one strand of saucers left - orchid.  I'm going to try them with gunmetal peanut beads and see how that looks.

One more thing for today.  If you look closely you can see a slight variation in the earrings:

One of these things is not like the others

Can you see it?  The red and green ones look slightly more "portrait" than the purple ones do.  I believe it was because on the purple ones I went from the outside of the peanuts that are surrounding the top saucer instead of from the inside.  Fortunately I noticed this before making the second earring.  Something to keep in mind if you're going to try this technique.  I like the longer look rather than the squatter look, but they're still pretty.

That's it for today!  I can't wait until the next Rings 'n Things sale (September 12th in Milwaukee!) so I can get more strands of these beads!  I definitely need another strand of red and lime green.  I passed on dark blue last time - I won't make that mistake again!  I have some gorgeous color-lined blue peanuts that will look fabulous with them....  I'm all twitterpated now.

Sunday, August 19, 2012

Making sales at a sale

As I've been mentioning for a while, I had a show yesterday - the Donna Lexa Memorial Art Fair in Wales, Wisconsin.

Here's how my space looked after we finished setting up:


The table fee was larger than any art/craft show I've been to and it was juried (meaning your work has to be quality to get in). I had high hopes that I would sell a bunch and make a lot of money.  Friends on Facebook all said I'd do fine and that I have beautiful work.  I should relax and enjoy myself.

The one thing I was worried about was the weather - outdoor shows are very risky - but it was beautiful.  It wasn't too hot, it didn't rain, and it wasn't very windy.  The sun did cause a bit of a problem, even with the tent, but in general the day was beautiful.

So I started the show with a positive attitude.  However, the morning started off slowly with just a trickle of people walking through (or biking through - we were along the Glacial Drumlin bike trail).  Those that did come by either walked on past or just glanced in as they walked.

As time went on the traffic at my booth picked up.  A number of people looked very interested, touching things, playing with my rings and key/badge holder (from my Crystal clay adventures post a few days ago), but then they walked away, many telling me I had beautiful things.  A few took my card.

The first hour passed with no sales.  Then the second.  Then the third.  Then the fourth.

Suffice it to say that Steve and I got increasingly more worried and distressed.

Mom and John came around 1:00 (I'm not sure exactly when), and she bought my red and black RAW set (see it in my Red and Black post).  This was my first sale.

Fortunately, it got a little better after that.  The red crystal ring (from my Crystal clay adventures post a few days ago) sold while Mom and John were still there.  I made two other sales between 2:00 and 3:00.

I was lucky that I sold enough to cover the show's costs (table fee + administrative fee) plus some extra.  If Mom hadn't bought from me, I would have only gone over the show's costs by $10.  I know she thinks she should count, but she's my mother, and she nearly always buys from me at my sales.  If she doesn't, John does.  Not that I'm not grateful, but she loved that necklace and would have bought it from me whether at a sale or not.

Then there's lunch we had to buy plus the gas to get there, and the show was... I hate to say it... a bust.  That's not even counting our time yesterday - two of us for an entire day.

So we set to analyzing what could have gone wrong, but we couldn't come up with anything.  I was pleasant and greeted everyone who came to the table (and even a few people who just walked by).  I tried not to be overbearing but pointed out when something they were looking at had matching pieces.  I explained what the key/badge holder was at least 10 times (I understand that not selling - it's to meet a very specific need) and told everyone who was looking at the rings that they're adjustable.  Because of the large price tags, I explained what Precious Metal Clay is when someone was interested in the large PMC medallion necklace (you can see that here) and what the different components were to other pieces (primarily the gear necklace you can see here).  I handed out business cards and said the pieces would be on Etsy if they didn't sell in case they changed their minds - those two pieces are $100 each.

Steve even tried a hard sell approach a few times:  "This necklace would go great with your coloring" or something similar, and Mom pointed out things to people saying, "Isn't this pretty?"

I complimented jewelry that customers were wearing or their clothes or purse.  I petted dogs and talked with children.  But most of the time we were just approachable.

People looked and complimented and asked about items then just left.  Steve said that it seemed that there was some sort of signal that made everyone at the table turn away.  It happened with one person, two people, five people...  All of a sudden they just left.

Maybe it was because I had just one table instead of a huge U or other multi-table set up.  Was there not enough to choose from?  Here's a close-up of my table:


I know that next time I'll want to have sides that come down on the tent to help with the sun.  I don't want it too dark in there, though.  We did move the table at one point to be better under the shade.

What about my prices?  Because it was a juried art fair I left my cheapest items at home.  I don't think there was anything under $7 (maybe a few pairs of earrings that I brought to match necklaces).  My rings were almost all $7, but it went up from there to $135.  The more expensive necklaces get a lot of looks and interest, but maybe they cost too much.  Because of the material costs and the labor that goes into them, I can't lower the prices by much.

Was it the type of items?  I have a myriad of different techniques:  strung, stitched, polymer clay, PMC, crystal clay, and even a steel wire (that's the gear necklace I mentioned earlier).  Is it because I have so many different styles?

Was it the type of show?  Steve said that maybe we should have attended the show before applying for it.  We've done that before.  I said that we would have decided it was a lovely fair.  It truly was.  There was music, food, a nice long row of booths with interesting and quality merchandise, and we parked the car in our booth space.  Can't get any better than that.

Was it that we were next to the silent auction booth?  That should have increased traffic, I would think.

So while I'm grateful that I made enough to cover the day's costs, I need to figure out what I need to do differently so I can succeed.  If you have any ideas, please e-mail me (traci@creative-pursuits.biz) and let me know, especially if you've been to one of my shows.  If you do shows, please let me know how you typically do at a show similar to this and if you have any tips for me.  How do you set up your booth (not in detail, of course) and how do you approach your customers?

Thanks for reading this and for any advice you can give me.

Thursday, August 16, 2012

Crystal clay adventures

I have been busy this week!  I have the Donna Lexa Memorial Art Fair (Mom, click that underliney-bit for show details) this Saturday, and I'm a bit frazzled making more things that I think will fit in.  However, I've had other things going on, too, and my Fibromyalgia is kicking in, so I'm not getting as much done as I'd like.  Throw in a doctor's appointment for Mom on Monday, voting on Tuesday, grocery shopping on Wednesday as well as shipping out a fairly large order (Hi, Karen!), and I'm pooped!

I have two days, though, so if I pace myself and focus (which is proving to be very difficult for me today), I should be in good shape.  Steve says I have enough, but I never feel as if I do.  You never know what last minute creation will be the one that sells.  A number of years ago I stayed up until about 4 am the night before a Christmas craft show making polymer clay beads that look like peppermint candies and putting them in earrings and a necklace.  They now look pretty crappy to me, but I sold quite a bit of it and everyone raved about the beads.  No more late nights for me, though.  I've learned my lesson, especially with the Fibro now.  The show itself will wipe me out for days - no need to pile on top of it with extra fatigue.

The one technique I've been working on this week is crystal clay.  It's called crystal clay because, well, the most common thing to do is to push crystals in.  It's kind of like polymer clay, but it doesn't need to be baked.  Left in the air it will dry to practically cement.  It's two part epoxy clay.  One part is the epoxy stuff, and the other part is the color/clay.  There are at least two brands - Crystal Clay and APOXIE Sculpt. 

I took a class, and these are the two pieces that turned out:


The third one didn't turn out because I didn't mix it well enough.  It's not hard and can be dented with my thumbnail.  Besides, the crystals don't look right.  One of these days I'm going to see if I can salvage the crystals and/or the bezel.  Until then, it sits on my desk as a reminder to mix well.

I'm not going to go into a huge amount of detail on how to use the clay.  It's pretty easy, and I don't want to take away from classes that are out there.  So I'm going to skim.  You'll get the general idea - enough to know if you want to try it and to either experiment or take a class.

First I planned out what I wanted to do.  My readers who know me well will be very surprised at this first project.  Totally out of my color comfort zone!  But I got the bezel on clearance, and the crystals were given to me in the class I took.  Are you ready?


Ack!  Copper and amber!

I took out a blob of each part of the clay, trying to approximate how much I'll need.  This is the hardest part for me - trying to guess.


That looks like an awful lot, but once I mixed it and pressed in into the bezel I had a nice raised square.  It's possibly a bit higher than I would like, but I'm okay with it.  It's copper and amber, after all.  :p  I pressed the three crystals I had chosen into the clay and added a few extras to fill in empty spaces:


I should say at this time that the black clay I'm using is the Crystal Clay brand.  You'll see some using white clay later, and that is the APOXIE Sculpt.

After I got everything placed where I wanted it, I decided to add a bit of sparkle to the clay.  I used a bronze Pearl Ex as lightly as I could.  I was able to get some of it up using Scotch tape, but the crystal clay is a bit stickier than polymer clay (Who knew?  Epoxy clay is sticky?) so I had to be very careful not to bring clay up with the Pearl Ex.  Here's what I ended up with:


I think it's pretty.  Not for me, but for someone who likes these colors.  :)

Here's the planning stage of another piece:


And here's the result:


I used the Micropearl Pearl Ex on this one, and I think it's a bit heavy.  I tried to take it off, but the clay was coming, too.  On this one I dented the clay with my pinky's fingernail to mimic the look of the bezel.  The petals didn't go quite in the same place as I had planned, but as I was working I could almost see where they were supposed to go.  Yeah, I know how crazy that sounds.  I'm an artist.  Deal with it.  :D

Here are the other pieces I made this week:


This is a key/badge holder I got from.... yeah, I don't remember where.  The petals of the flower are glass navette stones (they said they're black opal, but for that price they can't be.  Besides, the backs are all black).  My stepfather bought 72 of them on Ebay for me.  They'll last me a very long time!  I used a blue Pearl Ex to bring out the blues in the navettes.  I'm very pleased with how it turned out.

It'll be no surprise that most of the rest of the pieces I made this week use the navettes.  I have to use them up!

Here's an adjustable ring:


And a pair of earrings to go with it:


These earrings are lever backs that are already attached to the bezels.  Very neat (and I got them on clearance!).  I have them resting in blobs of polymer clay I use to display rings.  I couldn't get a picture of them otherwise - they roll around.  The Pearl Ex used on the ring and earrings is the Macropearl - it's more glitter than pearl but is pretty subtle, at least on the white clay.

I want to make a bracelet and pendant to match these two pieces, but I don't know if I'll have time before this weekend.  I have tons of other things I want to do!

The last piece I made is a one crystal adjustable ring.  I love the simple, elegant look of it:


The bezel is a bit taller than the crystal, so there's a line of white on the top and bottom.  The crystal really shines in the light.

That's it for the crystal clay for now!  Since I'll be frantic and frenetic (except I'll be slow and only somewhat energized in a rather wild and uncontrolled way instead of fast and energized) the rest of this week, I'm going to wait to blog again until Sunday or Monday.  Wish me luck at the show!


Sunday, August 12, 2012

Red and black, part 2

A few weeks ago I posted my red and black right angle weave bracelet (click here if you missed it).  Since then I made a right angle weave (RAW) bracelet for a cousin to give as a gift using Swarovski Crystal Silver Night bicones:


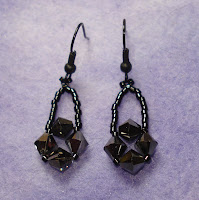
She asked if I could make earrings to match, so I tried out something I had been thinking about.  I made one RAW set and dangled it from lines of seed beads:


I was hoping for a more dramatic V, but I think they look good.  I thought about having them dangle longer, but I didn't know who they were for and didn't want to make them overly dramatic.

This weekend I made similar earrings and a necklace with the red saucers & black peanuts.

Here's the bracelet again to refresh your memory:


And here are the earrings I came up with:


I wanted a V instead of a U, but I think they look good.

And here's the necklace:


I didn't have too many saucers left, so I had to do my estimating and adjusting from a few days ago (part 1, part 2) to see what I could come up with.  I'm very happy how it turned out, but I had to remake most of the strand part.  I thought it was going to be around 17", but when I added the second strands, things shortened up a little.  16" seemed too short, and grumbling (okay, swearing) I decided it had to be longer, which meant taking a lot of it apart.  I had gone through each strand twice, so it was quite a mess getting them taken out.  Scissors flew, beads tumbled, and bits of threads had to be carefully picked out.

As I was doing it, I had little piles of beads counted out for each strand, and... I dropped my beading triangle (that scoops up the beads, for all you non-beader types) right in the middle, scattering beads everywhere.  There was more swearing grumbling.  I gave up on my piles and just counted the beads out for each strand as I was stitching it.  I added 15 extra peanuts for the last sections, and the necklace is now around 18" long.  It even fits me (miracle of miracles).

Since I have other colors of these saucer beads, I took copious notes on what I did for the necklace so I don't have to try to figure it out again.  I don't have as many saucers in some of the strands, so I'll have to make some adjustments, of course.

How many saucer beads do I have left over?  One.  Again with the one.  I must have lost a bead somewhere, because my inventory program showed I had one more than I actually had.  I don't recall, but beads are constantly hitting the floor in here.

Funny story - Steve and I went to the Wisconsin State Fair today with our good friends Cindy (she who always comes to the rescue) and her husband Russ.  We were walking through the Expo Center where everyone's trying to sell everything you've ever thought of and more.  Did you know there are devices that will turn practically anything into a speaker?  I didn't.  When I need speakers, I use speakers, not a styrofoam cooler.  Anyway.  One of the gadgets was the Mr. Sticky lint roller.  She must have known I was a cat person, as she pointed right to me and said, "Do you have cats?"  I looked down at my clothes for the tell-tale cat hair but didn't find any (for once).  She goes through her spiel about Mr. Sticky getting up cat hair, lint, spices, even cat litter.  She kept calling the lint roller "him".  It was quite disturbing.

I'm getting to the funny part - bear with me.  We finally extricate ourselves and start walking again, Cindy and I up front and the boys behind us.  I hear Russ say, "You know what that would be good for?  Beads."  Then they started discussing the pros and cons.  Steve said, "You have to rinse it.  All the beads would go down the drain."  I'm sure given enough time they would have come up with a solution - something with a strainer and pantyhose or some such.  I guess Cindy and I (and our friends) drop too many beads.  I know Steve frequently picks up something off of the floor (it doesn't matter which floor - practically any room in this house is a good candidate) and hands it to me.  "Here's another bead.  That doesn't look familiar.  Is it Michele's?"  Russ must do the same.


Friday, August 10, 2012

Estimating and adjusting, part 2

When I finished posting yesterday, I was ready to stitch up a bunch of mini keys and spiral them onto a bracelet.

After I stitched the 6th key, I was wondering if I wanted to stitch the 7th.  I started to think about where I wanted to place them along the bracelet.  Steve thought one right at the beginning and one after every inch, totaling 7.  I thought that might put the keys too close to the clasp and started playing around with a ruler and my piles of beads.

I decided to do a half inch of stitching before the first key then a key every inch after, leaving a half inch at the end:


The piles of 4 at the top left and right are for the clasp and the one pile of 4 at the left is for establishing the core.

After I'd stitched a few spirals I realized I was stitching through four of the core beads instead of three.  Four is what's usual (see my Anatomy of a Spiral post if you missed this discussion), but using only seed beads four core beads is one too many.  Grumbling, I took it apart.  Fortunately I hadn't gotten very far.

A half inch in, I added the first key:


I used two 15/0s on each side of the key's ring.  Here's what it looks like stitched into the rope:


If I do this again, I'm going to use 11/0s.  The smaller 15/0s tend to slip through the ring, and the key has a tendency to roam around a bit.  Not too much, but enough for me to change it for the next one.

I kept measuring as I stitched.  Turns out that 16 spirals is a touch over an inch, so by the time I ran out of beads, I had 6.5".  I had set aside 4 beads for each end of the clasp to add a little length, but I realized it wasn't necessary.  I wanted the bracelet to match the necklace if possible, so I stitched one more spiral, leaving 3 for each end of the clasp.


I stitched the clasp on, and here's the final bracelet:


It's almost 7.5" long.  Still too short for me (darn it!), but it's a good length for most everyone else.  I imagine the keys will move nicely but not be annoying.  They're light and make no noise.

So, how did my estimating go?  If you've paid attention, you'll know how many beads I have left over.

No?  I rambled too much and threw too many numbers at you?  I have one bead left.


The cheese stands alone

I had set aside 4 beads to establish the core but remembered later that I needed 3.  I thought that I might use 4 beads for one end of the clasp and 3 for the other end, but the asymmetry of it bothered me.  So I have one bead left.  I could toss it, but I have a few "bead soup" mixes that it can go into.

To sum up (no, there's no more math, I promise!), I was able to get what I wanted with the beads I had without really sacrificing my original plan.  I knew the earrings were most important, so I stitched those first so I knew what I had left to work with.  Then I did some estimating and adjusting to add a dash of purple to the key charms and still have enough to make an average-sized bracelet.  If I had wanted to size the bracelet to fit me, I would have used the black 15/0s for the clasp instead of the 11/0s to make it long enough.

Apart from my estimating being a tiny bit off (my estimated 1 inch was a little longer than 1 inch, but that's not the end of the world), I had no surprises and only one bead left.

Now I have one less tube in my stash and a beautiful set that I'm sure someone will love.


Thursday, August 9, 2012

Estimating and adjusting

Yesterday I very briefly mentioned making earrings and a bracelet to go with a black and purple necklace.  That necklace was shown and discussed in my Anatomy of a Spiral post a few weeks ago, but here it is on its own:


I have mini keys that match the larger keys I use as pendants, and I wanted to make a spiral rope bracelet to match the necklace with some mini keys as charms throughout the bracelet.

But I only have a small amount of those 11/0 purple beads left:


The beads came from an auction, and I don't know if I can find them again.  I set about finding out if I had enough to do everything I wanted.


I measured the rope near one of the ends and counted how many purple beads I'd need per inch.  I knew I used one per spiral section and one for the core, so I only counted spirals (which can be tricky - you have to keep turning the thing!).  There were about 16 per inch x 2 = 32 purple beads per inch.  I dumped my beads out and made piles of 32 to make sure I had at least enough for 7 inches plus extra for the earrings.  I had enough for the bracelet, but the leftover pile for the earrings didn't seem all that large.

I then measured the clasp, because I knew that would add length without too many purple beads:


Almost an inch and only 6 purples used.  I can probably get away with a little over six inches of rope, plus almost one inch for the clasp, and that will fit most people.  Not me, though, so this set better sell!  :)

I beaded the earrings to see what I had left over. Each earring is made with square stitch strips of 5 across and 6 rows, or 30 beads each.  60 beads sure took a dent out of my pile!


The six piles are the purples I'll need for each inch of the bracelet.  The little pile at the right is for the clasp, and the pile at the top is what's left over.

Not a very big pile, is it?  Since I don't want naked keys on my bracelet (oh, the scandal!), I did some serious thinking.  The keys don't need to be completely purple, but can I stitch the 11/0s with the matte black 15/0s used in the rope?  I tried it and found that I can do it if I don't use too many 11/0s:


This is good.. Less 11/0s = more keys on the bracelet!  There will be a little blast of purple that will move around as the key moves.

I parceled out the rest of the 11/0s in my pitiful pile for 5 more keys with one bead left over.  I then realized that each key will take the place of a purple on the rope, so I took my one leftover bead with two more beads so I can have an odd number of keys on the bracelet:


That should leave me enough for around a 7" bracelet with key charms!

Since this post is getting a bit long, and since it'll take me a few hours to bead up those 6 keys and the bracelet, I will close this now.  Come back tomorrow to see if my estimations were correct.  Wish me luck!