Before I show you the scrapbook pages, I'd like to acknowledge that today is Veterans Day and to thank all veterans for their service. I doubt many read this blog, so please extend my thanks to the veteran of your choice. :)
I'd also like to talk a bit about Vietnam veterans. Both my father and stepfather served in Vietnam, but it was rarely talked about while I was growing up. I asked my mother about it recently, and she said it was probably because there was a stigma surrounding the Vietnam War. Soldiers returned home one or two at a time, and there was no fanfare or celebration. They kind of skulked home, and many were treated poorly when they got there. That was ridiculous, of course, because there were so many who were drafted and didn't have the option of not going to war. I don't want to start a debate about whether or not the Vietnam War was worth fighting. It doesn't matter. What matters is the men (and women) who went and came back (or didn't).
There seems to be a big push in recent years to thank veterans for their service. This is a great thing, but the Vietnam vets still feel the stigma from time to time. My stepfather, John, has started wearing a "Vietnam Veteran" hat, and he said that in the South most people expressed their gratitude, but at home in Illinois, no one says a thing. There's even someone John has chatted with at the grocery store practically every week who blatantly ignored John when he saw the hat.
So, if you see someone with a hat or shirt or something that says he served in Vietnam, please take a moment to shake his hand and thank him. I bet you'll make his day.
Now on to a happier topic. Last month my husband and I went to Washington D.C. If you've never been, I highly recommend it. The architecture is beautiful, the memorials are stunning, and you'll hear a lot of foreign languages from the hundreds of visitors everywhere you go. It truly made me proud to be an American, and I think we all need a dose of that from time to time.
We're still scrapping our trip, but I do have a few pages to show you. Steve made this first set. It shows some of the buildings we loved as well as a few statues and a marker on the Points of Light walk.
Click the pictures if you'd like to see bigger versions of them.
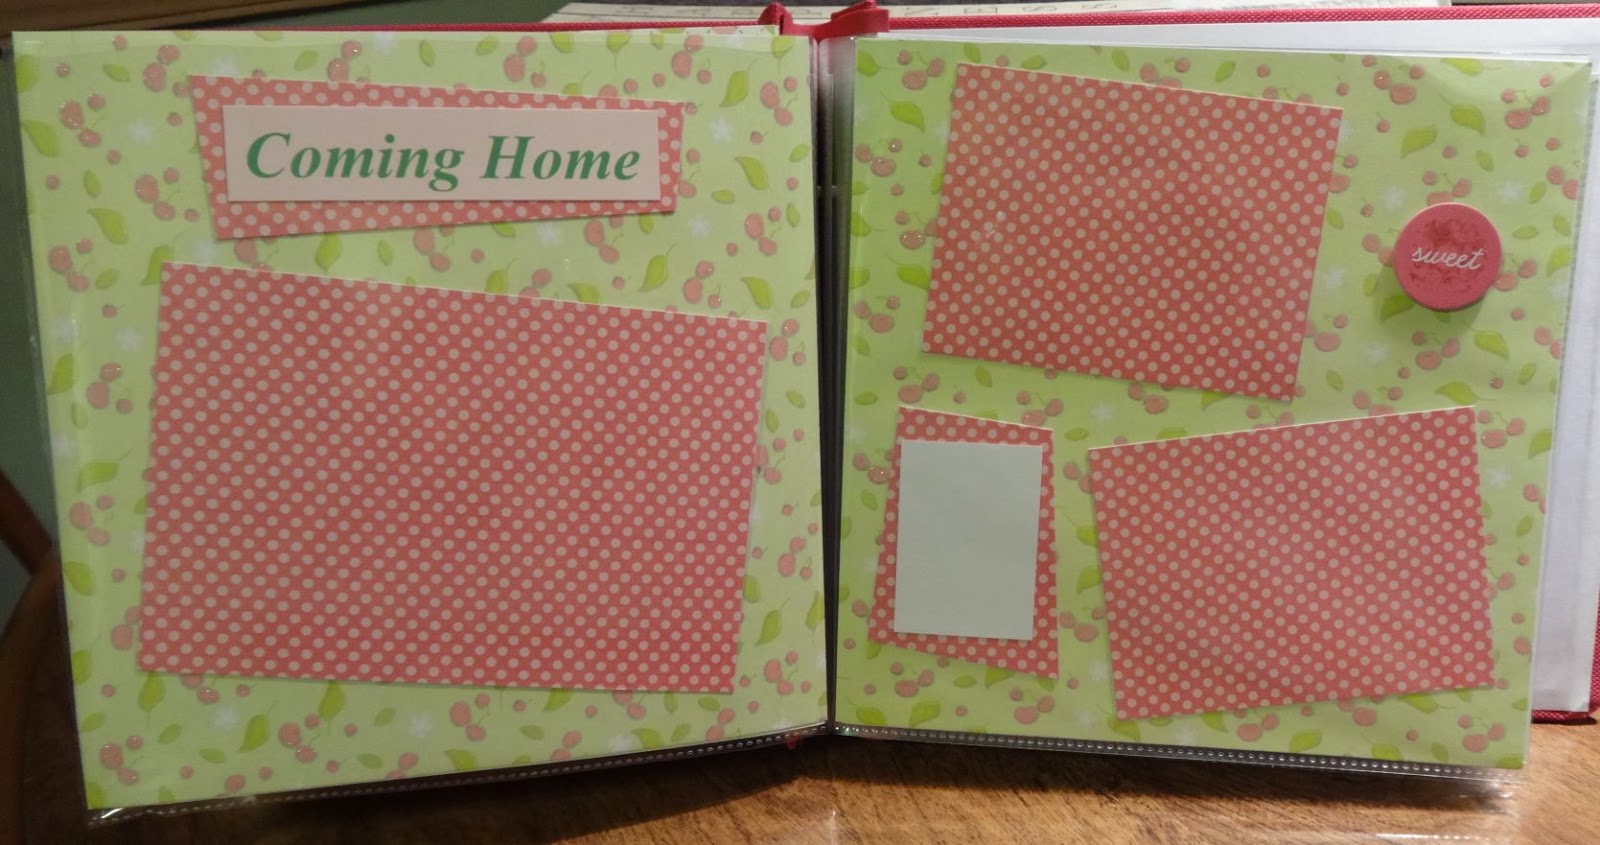
I made the second set of pages. I cheated and did my title and most of the journaling on the computer, but I think it fits well with the Thomas Jefferson Memorial:
Isn't that memorial beautiful! The day was gorgeous, too.
Check back for more pages as we get them done!
Showing posts with label scrapbooking. Show all posts
Tuesday, November 11, 2014
Saturday, September 13, 2014
Recipe scrapbook page - Chicken in Creamy Pan Sauce
I've blogged before about scrapping family recipes, although it seems I only posted about our German potato salad in More vinegar! In that post I explain why I think scrapping family recipes is so important, what to keep in mind while scrapping (showing before and after pictures, using your own or a relative's handwriting, and the like), and how important bacon is. If you haven't read that post (or if you'd like a refresher on all of the above), click here. I seemed to have been particularly witty that day, so that's worth checking it out if nothing else.
If you're a frequent reader of my blog (or even a pop-in-here-and-there reader), you know that jewelry designing and my business has been my main focus the last few years. I haven't done any scrapbooking at all, and the events have been piling up. We're about to go on vacation, so there will be a whole other book that will need to be done. Steve keeps making comments like, "if we ever scrap again," which upsets me, but I know he's right. Scrapping means that SO much has to be pulled out, and I have to remember where this punch or that embellishment is (or even if I have any appropriate embellishments).
With beads it seems so much easier. I typically buy everything I need for a project at the same time, pull anything else out from my extremely organized seed bead center, put it in a pile on my desk or in a baggie, and there it sits until I'm ready to start on it. I only need a small area on my desk to work, or if I'm going somewhere else to bead, I throw the baggie or pile of bead tubes in my extremely organized bead Caboodle (which can be seen in that same post, and which everyone calls my "magic box"). That's it! No muss, no fuss.
So Steve has decided to take matters in his own very capable hands. He has scrapped before, and not just gift albums for new babies (the most recent one can be seen here).
One of our favorite dinners is Kraft's Chicken in Creamy Pan Sauce, although we like calling it "Chicken in CREEPY Pan Sauce" or just "Creepy Chicken". We originally got the recipe from their website and printed it out. We always have it with cherry/grape tomatoes and basil on top, and it's so good. After making it dozens of times, the page was grease-spotted and slightly translucent. Instead of printing out another one, Steve thought it was time it was scrapped - scrapbooked, that is.
He took pictures of each of the steps, including...
gathering all the ingredients together:
frying the chicken:
cutting the tomatoes and basil:
and plating:
That looks so tasty! There's more sauce that goes on that, but you get the idea.
With a minimum of "Where's this? Where's that? What embellishments do you have?" Steve set up shop at the kitchen table and made a very cute set of scrapbook pages:
You can see he separated the steps out in text and pictures, and he split the title across both pages like I did in the "More Vinegar!" page. I like that he hand-drew the letters - it looks different from other pages we've done.
If you're worried about the pages getting messed up in the cooking process, don't. The pages are in protectors in an album, and the album is always kept away from the stove.
Here's the official recipe again: Chicken in Creamy Pan Sauce. If you'd like to see my Pinterest board of favorite recipes, you can find that here, or you can follow all of my boards (which includes pins of my blog posts as well as various craft and non-craft things I've found) here. If you follow me, I'll follow you!
Post a comment with your favorite online recipes (with links to the page if you can) here. We're always looking to try new things. I don't like peppers or spicy food, though, but post those recipes anyway so others can try them out. Who knows? Your recipe could become one of our favorites, and when that page becomes translucent, we'll scrap that one, too!
If you're a frequent reader of my blog (or even a pop-in-here-and-there reader), you know that jewelry designing and my business has been my main focus the last few years. I haven't done any scrapbooking at all, and the events have been piling up. We're about to go on vacation, so there will be a whole other book that will need to be done. Steve keeps making comments like, "if we ever scrap again," which upsets me, but I know he's right. Scrapping means that SO much has to be pulled out, and I have to remember where this punch or that embellishment is (or even if I have any appropriate embellishments).
With beads it seems so much easier. I typically buy everything I need for a project at the same time, pull anything else out from my extremely organized seed bead center, put it in a pile on my desk or in a baggie, and there it sits until I'm ready to start on it. I only need a small area on my desk to work, or if I'm going somewhere else to bead, I throw the baggie or pile of bead tubes in my extremely organized bead Caboodle (which can be seen in that same post, and which everyone calls my "magic box"). That's it! No muss, no fuss.
So Steve has decided to take matters in his own very capable hands. He has scrapped before, and not just gift albums for new babies (the most recent one can be seen here).
One of our favorite dinners is Kraft's Chicken in Creamy Pan Sauce, although we like calling it "Chicken in CREEPY Pan Sauce" or just "Creepy Chicken". We originally got the recipe from their website and printed it out. We always have it with cherry/grape tomatoes and basil on top, and it's so good. After making it dozens of times, the page was grease-spotted and slightly translucent. Instead of printing out another one, Steve thought it was time it was scrapped - scrapbooked, that is.
He took pictures of each of the steps, including...
gathering all the ingredients together:
frying the chicken:
cutting the tomatoes and basil:
and plating:
That looks so tasty! There's more sauce that goes on that, but you get the idea.
With a minimum of "Where's this? Where's that? What embellishments do you have?" Steve set up shop at the kitchen table and made a very cute set of scrapbook pages:
You can see he separated the steps out in text and pictures, and he split the title across both pages like I did in the "More Vinegar!" page. I like that he hand-drew the letters - it looks different from other pages we've done.
If you're worried about the pages getting messed up in the cooking process, don't. The pages are in protectors in an album, and the album is always kept away from the stove.
Here's the official recipe again: Chicken in Creamy Pan Sauce. If you'd like to see my Pinterest board of favorite recipes, you can find that here, or you can follow all of my boards (which includes pins of my blog posts as well as various craft and non-craft things I've found) here. If you follow me, I'll follow you!
Post a comment with your favorite online recipes (with links to the page if you can) here. We're always looking to try new things. I don't like peppers or spicy food, though, but post those recipes anyway so others can try them out. Who knows? Your recipe could become one of our favorites, and when that page becomes translucent, we'll scrap that one, too!
Saturday, August 30, 2014
Another gift album for a baby
Remember that Baobab baby pullover I've been working on? It's taking a long time, but I'm to the neck shaping portion, so I'm hoping it'll be done soon. It's bigger than it's supposed to be, so I hope when I'm done that it'll fit the baby. If not, then I'm prepared to knit a larger size, which will hopefully not take me nearly as long.
In the meantime, Steve made an 8x8 scrapbook that the parents can just add pictures and some journaling to. He's done this for the other babies born to his coworkers, so he's pretty quick by this time. I blogged about one in January (you can see that here, but the giveaway is over).
I'm only going to show you a few of the pages to hopefully give you some ideas for gifts or for your own scrapbooks.
Here's the first page introducing the baby:
Embellishments really make the pages easy to put together and are so cute! Steve found a pack of borders (there was a train right in front, so that was a no-brainer), so many of the pages have borders to give the album a cohesive look:
Steve added some embellishments on top of the borders in the above pages. That's a good way to use them up, and it makes the borders very cute!
The theme for the next set of pages is "Playtime", and the borders used are cars and trucks:
Here's what Steve did with the train borders:
The embellishment says, "our little MR", which is referring to the baby being a little mister, but "MR" also stands for "Model Railroader", which ties in to what the baby's father does. I'm hoping there will be pictures of the baby in an engineer's cap and overalls on these pages.
The next two pages are all about the "firsts" - haircut, bath, and tooth:
Steve did some of the pages while I was gone, so I was surprised when I flipped through the finished book and saw this:
He dipped into my scrapbook paper and embellishments! :) It's very cute, isn't it?
The final two pages I'll show you are the "Brotherly Love" pages necessary for babies who have older brothers:
Steve used my Quickutz for the letters and hearts, and he made his own border using a pair of fancy scissors.
That's it! I'll get to work on that sweater so I can show that to you, too!
In the meantime, Steve made an 8x8 scrapbook that the parents can just add pictures and some journaling to. He's done this for the other babies born to his coworkers, so he's pretty quick by this time. I blogged about one in January (you can see that here, but the giveaway is over).
I'm only going to show you a few of the pages to hopefully give you some ideas for gifts or for your own scrapbooks.
Here's the first page introducing the baby:
Embellishments really make the pages easy to put together and are so cute! Steve found a pack of borders (there was a train right in front, so that was a no-brainer), so many of the pages have borders to give the album a cohesive look:
Steve added some embellishments on top of the borders in the above pages. That's a good way to use them up, and it makes the borders very cute!
The theme for the next set of pages is "Playtime", and the borders used are cars and trucks:
Here's what Steve did with the train borders:
The embellishment says, "our little MR", which is referring to the baby being a little mister, but "MR" also stands for "Model Railroader", which ties in to what the baby's father does. I'm hoping there will be pictures of the baby in an engineer's cap and overalls on these pages.
The next two pages are all about the "firsts" - haircut, bath, and tooth:
Steve did some of the pages while I was gone, so I was surprised when I flipped through the finished book and saw this:
He dipped into my scrapbook paper and embellishments! :) It's very cute, isn't it?
The final two pages I'll show you are the "Brotherly Love" pages necessary for babies who have older brothers:
Steve used my Quickutz for the letters and hearts, and he made his own border using a pair of fancy scissors.
That's it! I'll get to work on that sweater so I can show that to you, too!
Tuesday, January 7, 2014
A giveaway and upcoming classes and embellishments! Oh, my!
Yesterday I told you about a giveaway I'm having for the pattern of the oh-so-adorable Owl and the Pussy Cat hat I showed you on Saturday. Check those two links out to see the hat and for more information on the giveaway. (Hint: E-mail me at traci@creative-pursuits.biz to enter! You have until Friday!)
Today is a huge day for all attendees and teachers of the Bead&Button Show - class registrations just opened! For more information on classes in general and to browse, click here. For my class, Cobblestone Path, click here.
Speaking of classes, I have updated my website to show all classes I'm teaching from now until the Bead&Button Show. If you're interested, click to find out more: Quadrille at Knot Just Beads; Simple, Stitched, Stylish at Knot Just Beads; Double Decker Daisy at Knot Just Beads; Stamped Dominoes at the LBS Retreat; It's Got Legs at the Madison Art Glass and Bead Show; and Cobblestone Path at the Bead&Button Show. Goodness, am I going to be busy! I'll have a booth at the Madison Art Glass and Bead Show, too, and I'll have a table at the B&B Show Meet the Teachers reception. There may be one other show, but I haven't received word on if I've gotten in. More on that later (hopefully)!
Yesterday I showed you a number of pages that Steve made for his coworker's new baby. Steve's coworker came back to work today after a vacation, and he loves the gifts! Yay! Let's hope the baby's Mama also loves them and that the hat fits the baby. ::cross fingers::
One of the things I mentioned about the album were that the embellishments were too tall for me to scan the pages. I thought I'd discuss that further and give a few tips on what you can do to "shrink" them down a little. I also want to show you some neat embellishments Steve made.
It seems to me that embellishments are getting thicker and thicker all the time. There are stickers, of course, which have no height to them at all, but there are other, fancier embellishments that use adhesive foam to give a more 3D look to your pages. Those are prettier than regular stickers, so I picked up a number of packages for Steve to use in this new album.
It didn't seem like he was using too many per page, but the album got thicker and thicker with each page he added. He added the only post extensions we had for that brand of album, but it still looked like this when he was done:
Do you see how the spine is thinner than the edge? Ideally it should be more like an equal sign (=) than a greater than sign (<).
Here's another look at the album:
That's fully closed. Do you see the white rectangles in the middle near the top? Those are for the embellishment I want to show you.
Here's a look that page:
You can see the shadow on the right side - the page protector can't lay flat because of the embellishment at the top.
That doesn't look too bad, does it? Let's look at it from the side:
It's two layers of the same embellishment, and there is foam on the back of each layer, plus the pie is raised, too:
It's cute, but unless you use embellishments like this sparingly, your album gets too thick too quickly (as we found out).
But what can you do? The embellishments are too cute to not use, so that's not an option. Each page should be as cute as the others, so you can't skimp too much. They're pretty expensive, so you really shouldn't buy too many (unless you hit a sale like I did).
One thing Steve did was to split one of these double-layered embellishments up so he had two instead of one. He was able to rub off the little bit of adhesive residue from the front of the bottom layer with his finger, but he also could have used UnDu. Since the picture is the same on both layers, he was able to make a cute header:
If you don't need both layers, you can still split the embellishment up to reduce the height.
If the reduced height is still too tall, you can take the foam adhesive bit off altogether and use your own adhesive. I did that with the pacifier on the card I made. It's still cute, but it's not bulky.
I mentioned that Steve made some neat embellishments for one of the pages. Since he used an 8"x8" album, he had strips of paper left over from each of the pages he made. He took scraps from this page:
and cut out some of the words. He used some foam adhesive I had to give them just a little bit of height and put them on this page:
So cute!
Yes, he could have just put the words on the page without any added height, but they really do pop out. Like everything in life there has to be a balance. Knowing what we know now, I think we're going to do some thinning out of embellishments on future albums.
That will be it for scrapbooking for a while. My grown-up looking hat is done, and I'm a foot into my grown-up looking scarf. I'm going to go work on it now, and hopefully I'll have something to show you soon!
Today is a huge day for all attendees and teachers of the Bead&Button Show - class registrations just opened! For more information on classes in general and to browse, click here. For my class, Cobblestone Path, click here.
Speaking of classes, I have updated my website to show all classes I'm teaching from now until the Bead&Button Show. If you're interested, click to find out more: Quadrille at Knot Just Beads; Simple, Stitched, Stylish at Knot Just Beads; Double Decker Daisy at Knot Just Beads; Stamped Dominoes at the LBS Retreat; It's Got Legs at the Madison Art Glass and Bead Show; and Cobblestone Path at the Bead&Button Show. Goodness, am I going to be busy! I'll have a booth at the Madison Art Glass and Bead Show, too, and I'll have a table at the B&B Show Meet the Teachers reception. There may be one other show, but I haven't received word on if I've gotten in. More on that later (hopefully)!
Yesterday I showed you a number of pages that Steve made for his coworker's new baby. Steve's coworker came back to work today after a vacation, and he loves the gifts! Yay! Let's hope the baby's Mama also loves them and that the hat fits the baby. ::cross fingers::
One of the things I mentioned about the album were that the embellishments were too tall for me to scan the pages. I thought I'd discuss that further and give a few tips on what you can do to "shrink" them down a little. I also want to show you some neat embellishments Steve made.
It seems to me that embellishments are getting thicker and thicker all the time. There are stickers, of course, which have no height to them at all, but there are other, fancier embellishments that use adhesive foam to give a more 3D look to your pages. Those are prettier than regular stickers, so I picked up a number of packages for Steve to use in this new album.
It didn't seem like he was using too many per page, but the album got thicker and thicker with each page he added. He added the only post extensions we had for that brand of album, but it still looked like this when he was done:
Do you see how the spine is thinner than the edge? Ideally it should be more like an equal sign (=) than a greater than sign (<).
Here's another look at the album:
That's fully closed. Do you see the white rectangles in the middle near the top? Those are for the embellishment I want to show you.
Here's a look that page:
You can see the shadow on the right side - the page protector can't lay flat because of the embellishment at the top.
That doesn't look too bad, does it? Let's look at it from the side:
It's two layers of the same embellishment, and there is foam on the back of each layer, plus the pie is raised, too:
It's cute, but unless you use embellishments like this sparingly, your album gets too thick too quickly (as we found out).
But what can you do? The embellishments are too cute to not use, so that's not an option. Each page should be as cute as the others, so you can't skimp too much. They're pretty expensive, so you really shouldn't buy too many (unless you hit a sale like I did).
One thing Steve did was to split one of these double-layered embellishments up so he had two instead of one. He was able to rub off the little bit of adhesive residue from the front of the bottom layer with his finger, but he also could have used UnDu. Since the picture is the same on both layers, he was able to make a cute header:
If you don't need both layers, you can still split the embellishment up to reduce the height.
If the reduced height is still too tall, you can take the foam adhesive bit off altogether and use your own adhesive. I did that with the pacifier on the card I made. It's still cute, but it's not bulky.
I mentioned that Steve made some neat embellishments for one of the pages. Since he used an 8"x8" album, he had strips of paper left over from each of the pages he made. He took scraps from this page:
and cut out some of the words. He used some foam adhesive I had to give them just a little bit of height and put them on this page:
So cute!
Yes, he could have just put the words on the page without any added height, but they really do pop out. Like everything in life there has to be a balance. Knowing what we know now, I think we're going to do some thinning out of embellishments on future albums.
That will be it for scrapbooking for a while. My grown-up looking hat is done, and I'm a foot into my grown-up looking scarf. I'm going to go work on it now, and hopefully I'll have something to show you soon!
Monday, January 6, 2014
Gift album for a baby and a GIVEAWAY!
Before I get into the album, I have wonderful news: the author of the Owl and the Pussy Cat baby hat I blogged about on Saturday would like to give a copy of the pattern to one of my readers! That's so sweet of her! The instructions are written in sizes from birth to 2 years old, although I bet crafty knitters using thicker yarn and bigger needles could make it work for older children as well. As I mentioned in my blog post, the pattern is very easy to understand, and the cabled owls are adorable.
So if you'd like the pattern for this hat:
minus the pom pom (that was my addition), all you need to do is e-mail traci@creative-pursuits.biz. I thought about having you comment here, but then how would I get your e-mail address? The author is from South Africa, so you'll have a pattern that has crossed the ocean. I think that's neat! I will keep the contest going until Friday, and I will pull the lucky winner's name out of a hat. It won't be the baby hat, however. That's still in my husband's office waiting for the baby's father to come back to work.
In case you're all wondering if I'm keeping to my resolution to create/work on something every day, I am. I'm nearly done with my grown-up looking hat I've been talking about, then I'm going to work on a scarf to match.
Now on to today's event: The album Steve made for the baby who will wear the above hat. I'm not going to show all the pages, but you'll get a good idea of how the album looks if you'd like to make something similar for your own child or for a gift.
Steve has done this a number of times now, and he's getting really good at it. The first thing he does is make a list of pages, such as baby's first portrait (the ultrasound), baby's room, meeting the cat or a sibling, baptism, and dinner time.
I like using 8"x8" albums for gifts like this, but 12"x12" albums work, too. Now that I write that, I remember that I wrote a blog post with a crash course in gift album scrapping back in 2012. The basic idea here is the same, but we're not including any pictures.
Apart from the solid colors, all of the papers are from one paper pack - DCWV's Nana's Nursery Baby Girl - to give the album a look of cohesion. I bought 4-5 packs of embellishments, and Steve used all but one little pacifier that I used on the card I showed you yesterday.
Because of the height of most of the embellishments, I didn't try scanning the pages to show you. I'll discuss the embellishments tomorrow. I did take pictures, and I hope they're clear enough for you to get an idea of what he did.
Here's the front page for the album:
Steve made a mat using a corner punch specifically designed to tuck pictures underneath. He hand wrote the size of the picture in the middle of the mat to help the parents out. The strip at the bottom is for all the birth information: name, born on, time, weight, and length.
The next page is simple but very cute:
It's a playful page for pictures of the baby's room.
Here are a few more pages:
Steve included journaling boxes on many of the pages so the parents can write a bit about what's going on in the pictures.
He also included some wacky things, such as the stars in the Brotherly Love page, above, and the patterned paper flowers on the Let's Play page:
I think it's a really cute album! What I really like about the papers Steve used and how he put it all together is that it's not overly girly and baby-y. I know that's not a word, but infantile just didn't seem to work there. While there are elements of baby items (such as a mobile, baby bottles, and pacifiers) and lots of pink, it's not overpowering. I'm not sure I could have done as good of a job on that as Steve did.
Now I need to go finish that hat so I can blog about it on Wednesday. Also, there's a heated blanket waiting for me, which is most appreciated on this very, very cold day. (We're up to -14! Woo hoo!)
Remember the giveaway... e-mail traci@creative-pursuits.biz to enter!
So if you'd like the pattern for this hat:
minus the pom pom (that was my addition), all you need to do is e-mail traci@creative-pursuits.biz. I thought about having you comment here, but then how would I get your e-mail address? The author is from South Africa, so you'll have a pattern that has crossed the ocean. I think that's neat! I will keep the contest going until Friday, and I will pull the lucky winner's name out of a hat. It won't be the baby hat, however. That's still in my husband's office waiting for the baby's father to come back to work.
In case you're all wondering if I'm keeping to my resolution to create/work on something every day, I am. I'm nearly done with my grown-up looking hat I've been talking about, then I'm going to work on a scarf to match.
Now on to today's event: The album Steve made for the baby who will wear the above hat. I'm not going to show all the pages, but you'll get a good idea of how the album looks if you'd like to make something similar for your own child or for a gift.
Steve has done this a number of times now, and he's getting really good at it. The first thing he does is make a list of pages, such as baby's first portrait (the ultrasound), baby's room, meeting the cat or a sibling, baptism, and dinner time.
I like using 8"x8" albums for gifts like this, but 12"x12" albums work, too. Now that I write that, I remember that I wrote a blog post with a crash course in gift album scrapping back in 2012. The basic idea here is the same, but we're not including any pictures.
Apart from the solid colors, all of the papers are from one paper pack - DCWV's Nana's Nursery Baby Girl - to give the album a look of cohesion. I bought 4-5 packs of embellishments, and Steve used all but one little pacifier that I used on the card I showed you yesterday.
Because of the height of most of the embellishments, I didn't try scanning the pages to show you. I'll discuss the embellishments tomorrow. I did take pictures, and I hope they're clear enough for you to get an idea of what he did.
Here's the front page for the album:
Steve made a mat using a corner punch specifically designed to tuck pictures underneath. He hand wrote the size of the picture in the middle of the mat to help the parents out. The strip at the bottom is for all the birth information: name, born on, time, weight, and length.
The next page is simple but very cute:
It's a playful page for pictures of the baby's room.
Here are a few more pages:
Steve included journaling boxes on many of the pages so the parents can write a bit about what's going on in the pictures.
He also included some wacky things, such as the stars in the Brotherly Love page, above, and the patterned paper flowers on the Let's Play page:
I think it's a really cute album! What I really like about the papers Steve used and how he put it all together is that it's not overly girly and baby-y. I know that's not a word, but infantile just didn't seem to work there. While there are elements of baby items (such as a mobile, baby bottles, and pacifiers) and lots of pink, it's not overpowering. I'm not sure I could have done as good of a job on that as Steve did.
Now I need to go finish that hat so I can blog about it on Wednesday. Also, there's a heated blanket waiting for me, which is most appreciated on this very, very cold day. (We're up to -14! Woo hoo!)
Remember the giveaway... e-mail traci@creative-pursuits.biz to enter!
Sunday, January 5, 2014
Quick baby card
I'm up to 5 responses on my survey now! I'm positively giddy! Thank you all so much for your input and support. If anyone else would like to weigh in, you can take the survey here.
Today will be very quick. Again, if you're the mother of a baby girl who couldn't read yesterday's blog post, please don't read this post yet, either. :)
Tomorrow and Tuesday I'm going to show you some pages of the scrapbook Steve made for the baby. The scrapbook was 8"x8", and the papers he used started out as 12"x12", so we have plenty of scraps left over. I used a few of them along with a stamped saying, and a leftover embellishment for a quick but cute card:
Since the baby is already a few months old, I chose a stamp addressing her instead of a general "Yay! Baby is here!" stamp. I carried that theme through to the inside of the card and wrote to her instead of to her parents. I hope they think it's cute.
I hope you're warm wherever you are. Here in Milwaukee the low tonight will be -19 (real temperature, not wind chill), and tomorrow's HIGH will be -13. According to Yahoo! weather for tonight, "Dangerous wind chills may approach -50 °F". Ack. I'm glad I can stay home, and I hope Steve won't have to go to work tomorrow.
Today will be very quick. Again, if you're the mother of a baby girl who couldn't read yesterday's blog post, please don't read this post yet, either. :)
Tomorrow and Tuesday I'm going to show you some pages of the scrapbook Steve made for the baby. The scrapbook was 8"x8", and the papers he used started out as 12"x12", so we have plenty of scraps left over. I used a few of them along with a stamped saying, and a leftover embellishment for a quick but cute card:
Since the baby is already a few months old, I chose a stamp addressing her instead of a general "Yay! Baby is here!" stamp. I carried that theme through to the inside of the card and wrote to her instead of to her parents. I hope they think it's cute.
I hope you're warm wherever you are. Here in Milwaukee the low tonight will be -19 (real temperature, not wind chill), and tomorrow's HIGH will be -13. According to Yahoo! weather for tonight, "Dangerous wind chills may approach -50 °F". Ack. I'm glad I can stay home, and I hope Steve won't have to go to work tomorrow.
Wednesday, January 1, 2014
2014 Day 1: Katy's Memorial
Happy January 1! If you missed my blog post yesterday, I am running a survey to know what kinds of things you'd like to read about. So far only my mother has responded, so even though I'm happy to get feedback from her, I need a little more input. If you'd like to participate, you can access the survey here. Thanks!
Today is the first day of my "resolution" to create something new every day. Not only am I going to experiment with new techniques and (hopefully) create new jewelry designs, but I am also going to work on my backlog of projects. At the end of the year, I hope I will have made a serious dent in the pile!
One of the projects I have been putting off is a memorial frame for Katy, our cat who passed away in August. You can read more about her at the end of this blog post. I decided that should be the first project of the new year. Yes, it's sad, but I like to think that it sets a good tone of love and remembrance for 2014.
When my first two cats, Perin and Simoon, passed away, they gave me clay casts of their paw prints. I have them both in my studio. However, when it was Katy's time, the vet said they didn't do clay casts but could make ink prints on nice cardstock.
We were grateful for anything, of course. When it arrived, her name and paw prints were underneath the Rainbow Bridge poem. We could have just framed the whole sheet, but I wanted to include pictures of Katy and to cut off the poem. It's a very sweet poem, but I really didn't want to have it hanging in my hallway. It makes me cry. :)
The other thing with the paw print paper (say that ten times fast!) is that it didn't have the date she passed away. We wanted to include that, so I looked through my rub-ons and stickers but couldn't find anything suitable. After running a few tests on plain paper, I printed the date right under her name. Fortunately the printer didn't jam! Whew!
I picked a cute paw print scrapbook paper out of the many, many cat papers I have. I also found a loving but cute cat quote out of the many, many cat embellishments I have. I put all that together with two pictures of Katy, and here it is:
Yes, that's Katy eating a marshmallow. It was quite amusing to watch!
In case you can't read it, the quote says: "No amount of time can erase the memory of a good cat, and no amount of masking tape can ever totally remove his fur from your couch. - Leo Dwarken" Considering Katy was a very good cat who shed on everything, I thought this was perfect.
The main reason I had been putting this project off is that I wanted something that Steve would think was special. Katy was his cat, and I didn't want to mess it up. Fortunately, when I showed the frame to Steve, he really liked it.
Today is the first day of my "resolution" to create something new every day. Not only am I going to experiment with new techniques and (hopefully) create new jewelry designs, but I am also going to work on my backlog of projects. At the end of the year, I hope I will have made a serious dent in the pile!
One of the projects I have been putting off is a memorial frame for Katy, our cat who passed away in August. You can read more about her at the end of this blog post. I decided that should be the first project of the new year. Yes, it's sad, but I like to think that it sets a good tone of love and remembrance for 2014.
When my first two cats, Perin and Simoon, passed away, they gave me clay casts of their paw prints. I have them both in my studio. However, when it was Katy's time, the vet said they didn't do clay casts but could make ink prints on nice cardstock.
We were grateful for anything, of course. When it arrived, her name and paw prints were underneath the Rainbow Bridge poem. We could have just framed the whole sheet, but I wanted to include pictures of Katy and to cut off the poem. It's a very sweet poem, but I really didn't want to have it hanging in my hallway. It makes me cry. :)
The other thing with the paw print paper (say that ten times fast!) is that it didn't have the date she passed away. We wanted to include that, so I looked through my rub-ons and stickers but couldn't find anything suitable. After running a few tests on plain paper, I printed the date right under her name. Fortunately the printer didn't jam! Whew!
I picked a cute paw print scrapbook paper out of the many, many cat papers I have. I also found a loving but cute cat quote out of the many, many cat embellishments I have. I put all that together with two pictures of Katy, and here it is:
Yes, that's Katy eating a marshmallow. It was quite amusing to watch!
In case you can't read it, the quote says: "No amount of time can erase the memory of a good cat, and no amount of masking tape can ever totally remove his fur from your couch. - Leo Dwarken" Considering Katy was a very good cat who shed on everything, I thought this was perfect.
The main reason I had been putting this project off is that I wanted something that Steve would think was special. Katy was his cat, and I didn't want to mess it up. Fortunately, when I showed the frame to Steve, he really liked it.
Tuesday, December 17, 2013
Using scrapbooking tools to solve everyday problems
Last night was the Loose Bead Society's annual holiday party. A bunch of us brought cookies (or fudge or whatever) to share. It's always nice to see and taste things that I wouldn't normally make. Someone brought Pizzelles - "Italian waffle cookies". I like them because they're not as rich as other cookies and because they're very pretty.
I brought cornflake cookies. They have marshmallows, butter, cornflakes (obviously), and green food coloring. I don't know where we got the recipe from, but I remember eating them when I was little a long, long time ago. Not only are they delicious, but they make your tongue green. I'd say something about other things turning green, but I don't want to get crude.
The best way to store and transport cookies is in a cookie tin, right? What I've always hated about tins is that you need to line them with wax (or parchment) paper. For cookies that stick together (like the cornflake cookies), it's best to stick paper between layers. The tins are nearly always round, and the papers are always square. That means you have a bunch of paper crowding around the edges taking up valuable cookie space.
Remember that cutting board I used when I made my duct tape purse last week? That was from my "Curvy Cutter" circle/oval cutting set. Since I'm a procrastinator, I hadn't put it all away yet. I decided to try cutting the wax paper with the circle cutter, and it worked!
That got me thinking of all of those commercials where they have the perfect solution to an everyday problem, so I made my own little commercial:
I have to tell you - I recorded the video once (hence the bit of stuttering at the end) and spent 2-3 hours getting it edited and in a format I could put on the blog. I really should have quit, but I was bound and determined to get it done exactly the way I wanted it to be done. My ingenuity and "there's more than one way to skin a cat" (catfish, not kitty cat, of course) attitude came through again, and I was successful! I hope everyone can view it okay.
For those of you who have never heard my voice - that's not how I normally talk. That's my "perfect solution" commercial voice. I probably am normally that nasally, though.
To sum up what's on the video:
Unfortunately, I wasn't able to make a large enough circle for my large tin. I just did a search to see if there were any larger Curvy Cutters, and I found that they've discontinued the product. I guess I've had mine a really long time, huh? I wonder if I'll be able to find a replacement blade if I need it.
I did see that Martha Stewart Crafts has a few circle cutters, and I bet they would work just as well. The small one
cuts from 1" to 5 7/8" in 1/16" increments, and the large one
cuts from 4" to 12" in 1/8" increments.
Now, I'm not advocating buying a circle cutter (or two) just for cutting wax paper to line your cookie tins, but if you're a scrapper who wants to expand the uses of your tools, this is one way you can do just that. I'm sure there are other non-scrapping uses for circle cutters, but, frankly, the video editing has used up all of my ingenuity brain cells for the night.
Do you have any non-scrapping uses for circle cutters or other scrapping tools? E-mail me at traci@creative-pursuits.biz and let me know!
If you've been hoping that I'd share the recipe for those tasty, tasty cookies, here you go:
The side benefit for me posting the recipe here is that if I lose it (again), I won't have to ask my mother to send it to me (for the 20th time).
I brought cornflake cookies. They have marshmallows, butter, cornflakes (obviously), and green food coloring. I don't know where we got the recipe from, but I remember eating them when I was little a long, long time ago. Not only are they delicious, but they make your tongue green. I'd say something about other things turning green, but I don't want to get crude.
The best way to store and transport cookies is in a cookie tin, right? What I've always hated about tins is that you need to line them with wax (or parchment) paper. For cookies that stick together (like the cornflake cookies), it's best to stick paper between layers. The tins are nearly always round, and the papers are always square. That means you have a bunch of paper crowding around the edges taking up valuable cookie space.
Remember that cutting board I used when I made my duct tape purse last week? That was from my "Curvy Cutter" circle/oval cutting set. Since I'm a procrastinator, I hadn't put it all away yet. I decided to try cutting the wax paper with the circle cutter, and it worked!
That got me thinking of all of those commercials where they have the perfect solution to an everyday problem, so I made my own little commercial:
I have to tell you - I recorded the video once (hence the bit of stuttering at the end) and spent 2-3 hours getting it edited and in a format I could put on the blog. I really should have quit, but I was bound and determined to get it done exactly the way I wanted it to be done. My ingenuity and "there's more than one way to skin a cat" (catfish, not kitty cat, of course) attitude came through again, and I was successful! I hope everyone can view it okay.
For those of you who have never heard my voice - that's not how I normally talk. That's my "perfect solution" commercial voice. I probably am normally that nasally, though.
To sum up what's on the video:
- I used the Curvy Cutter template to figure out what size I needed to cut
- I adjusted the blade tool to the right setting (the widest in this case) and set the cutter in the right track of the cutter tool (the second track)
- I moved the blade tool around the track to cut the wax paper
- I put the circle of wax paper in the tin (yes, I know this step is obvious, but by now you all know how thorough I am)
Unfortunately, I wasn't able to make a large enough circle for my large tin. I just did a search to see if there were any larger Curvy Cutters, and I found that they've discontinued the product. I guess I've had mine a really long time, huh? I wonder if I'll be able to find a replacement blade if I need it.
I did see that Martha Stewart Crafts has a few circle cutters, and I bet they would work just as well. The small one
Now, I'm not advocating buying a circle cutter (or two) just for cutting wax paper to line your cookie tins, but if you're a scrapper who wants to expand the uses of your tools, this is one way you can do just that. I'm sure there are other non-scrapping uses for circle cutters, but, frankly, the video editing has used up all of my ingenuity brain cells for the night.
Do you have any non-scrapping uses for circle cutters or other scrapping tools? E-mail me at traci@creative-pursuits.biz and let me know!
If you've been hoping that I'd share the recipe for those tasty, tasty cookies, here you go:
Cornflake Cookies
1 stick of butter
1/4 teaspoon vanilla extract
30 large marshmallows
3 cups cornflakes
1 teaspoon green food coloring
Red sugar
Melt marshmallows and butter in a double boiler. Add vanilla and food coloring. Stir in cornflakes - carefully - and drop in tablespoon-sized blobs on wax paper. Sprinkle with red sugar. Wait to cool. Store in the refrigerator.
The side benefit for me posting the recipe here is that if I lose it (again), I won't have to ask my mother to send it to me (for the 20th time).
Friday, July 27, 2012
More vinegar!
Today Steve and I were busy with last minute preparations for his parents to arrive. The day went something like this:
"What else needs to be done?"
"De-furring (4 cats create a LOT of fur that gets deposited on EVERYTHING), back bathroom, floor, litter...."
"Oh, crap! Look at _____. That needs to be cleaned!"
Along with all of this I needed to make German potato salad for tomorrow. My mother and stepfather are coming to see Steve's parents, and Steve requested the potato salad. Here's how the conversation with my mother went:
"So, what can we bring?"
"German potato salad?"
":::groan:::"
"Okay - how about deviled eggs and corn on the cob?"
":::cheerful-acceptance-of-less-arduous-task:::"
I had already come to peace with making it myself, but it was worth a shot!
(note, greater than and less than signs are HTML tags and should not be used while emoting groans or cheerful acceptances, even when typing in "Compose" mode)
But, Traci, this is a CRAFT blog. Sure, you go off on tangents every once in a while, but really, you need to tie this into crafting somehow.
Alrighty, how about scrapbook pages?
You can click on the pictures to make them bigger. I didn't use the Flip-Pal Mobile Scanner for these pages because I think the brads I'm using for the bullet points are too bulky. The resultant scan would probably be blurry. Besides, Pixel is on my desk, and I don't have the space to scan. Also besides, it's been a long day, and I wanted to do something quick.
I love making pages for family recipes. First of all, this is a great way to keep the family recipes safe, especially those that get plastered all over a blog. Second, by taking pictures of the process, it can help people who haven't made the recipe before figure out what needs to be done. In this case it's not essential, but there are a few steps in the German wedding soup that benefit from pictures. Third, it really makes you stop and think about what you're doing if you're taking process shots while cooking. If you can find old pictures of family members eating the dish, that ties the whole thing back to what's really important - your family.
Since those pictures are pretty small, let's blow a few sections up for further scrutiny:
And finally...
This was supposed to be a quick post. Hopefully you've gotten some good ideas out of this. Or, at the very least, I hope you've gotten hungry.
For my non-scrappers: You don't have to scrap to achieve the same results. Get an album with sleeves for certain sizes of pictures (usually 4x6). Take the process shots and put them in the sleeves along with the handwritten recipe. They actually have recipe books just for this purpose - I've seen them at Archiver's. Any ready-to-use scrapbook with sleeves will work, though. The most important thing is to get those recipes down so that future generations will be able to keep your family history alive.
"What else needs to be done?"
"De-furring (4 cats create a LOT of fur that gets deposited on EVERYTHING), back bathroom, floor, litter...."
"Oh, crap! Look at _____. That needs to be cleaned!"
Along with all of this I needed to make German potato salad for tomorrow. My mother and stepfather are coming to see Steve's parents, and Steve requested the potato salad. Here's how the conversation with my mother went:
"So, what can we bring?"
"German potato salad?"
":::groan:::"
"Okay - how about deviled eggs and corn on the cob?"
":::cheerful-acceptance-of-less-arduous-task:::"
I had already come to peace with making it myself, but it was worth a shot!
(note, greater than and less than signs are HTML tags and should not be used while emoting groans or cheerful acceptances, even when typing in "Compose" mode)
But, Traci, this is a CRAFT blog. Sure, you go off on tangents every once in a while, but really, you need to tie this into crafting somehow.
Alrighty, how about scrapbook pages?
You can click on the pictures to make them bigger. I didn't use the Flip-Pal Mobile Scanner for these pages because I think the brads I'm using for the bullet points are too bulky. The resultant scan would probably be blurry. Besides, Pixel is on my desk, and I don't have the space to scan. Also besides, it's been a long day, and I wanted to do something quick.
I love making pages for family recipes. First of all, this is a great way to keep the family recipes safe, especially those that get plastered all over a blog. Second, by taking pictures of the process, it can help people who haven't made the recipe before figure out what needs to be done. In this case it's not essential, but there are a few steps in the German wedding soup that benefit from pictures. Third, it really makes you stop and think about what you're doing if you're taking process shots while cooking. If you can find old pictures of family members eating the dish, that ties the whole thing back to what's really important - your family.
Since those pictures are pretty small, let's blow a few sections up for further scrutiny:
- Before-during-after. This is a quick way to show how to do something. Yeah, I could have skipped the first two pictures, but how else would you be impressed with the process of peeling a mountain of HOT potatoes then slicing them?
Steve: "But why do you peel them after boiling? Wouldn't it be easier to peel them before?"
Traci, Traci's Mom, Traci's Omi, and all other women before her: "This is how it's done."
- Split the title across the pages. This helps tie the two pages together. Granted, it doesn't look all that good separated like this, and in an album the pages will never be RIGHT next to each other, but it does help draw the eye. Also, if you create a vague title like mine, people will ask you what the food is. Honestly didn't occur to me to have to name the thing. It's obviously German potato salad. Duh (for someone who has eaten it her whole life).
- Write directly on the pictures. Do not use a regular pen for this. Use a Slick Writer pen or photo marker or something that is specially designed for glossy surfaces. Otherwise you'll have a smeary mess on your hands. Now everyone can see "The Drama of Potato Slices" and how beautiful my hard boiled eggs were that day. Not so my eggs since I moved into this house with its electric stove. I've looked online for help, but no matter what I do, I'm having a really hard time getting the shells off the eggs without taking a layer of whites off as well.
I did grab the Flip-Pal Mobile Scanner for these pictures and the rest on this page - crops from the main pictures were far too blurry.
- Use brads for bullet points. See - the bulkiness of the brads made that part of the page blurry with the scanner. Anyway - you can see most of my gas-stove egg-boiling process. For electric stoves, I've been putting the eggs in cold water, bringing the water to a rolling boil, keeping it on the heat for about a minute, then taking it off the heat for about 12 minutes. Rinse in cold water and swear while peeling. Anyone have a better way?
Anyway. If you use brads as bullet points, they help separate the processes as well as being pretty. I remember that I used all of these brads - 3 square and 2 round - on this recipe. In case you haven't figured this out from yesterday's post, I really like using things up. - Use your own (or a relative's) handwriting. I've mentioned this before (see my blog post from June 28th, 2010), so I won't go into it now. Yes, you can make mistakes (like I did with "boil" in the upper right of the above picture), but that helps the page have personality. If you happen to have the recipe written in your grandmother's or mother's or great aunt's handwriting, make a copy of it and USE it. You'll hear her voice in your head whenever you make the recipe.
And finally...
- Bacon. You can't go wrong with a picture of sizzling bacon and onions (a German staple). Seriously, though (not that bacon isn't serious enough), Lazy Scrapper didn't want to mat all the pictures, so I matted two - one on the left (the potato process) and this one. It's subtle but helps to draw the eye along the page, unless your eye is drawn directly to bacon.
This was supposed to be a quick post. Hopefully you've gotten some good ideas out of this. Or, at the very least, I hope you've gotten hungry.
For my non-scrappers: You don't have to scrap to achieve the same results. Get an album with sleeves for certain sizes of pictures (usually 4x6). Take the process shots and put them in the sleeves along with the handwritten recipe. They actually have recipe books just for this purpose - I've seen them at Archiver's. Any ready-to-use scrapbook with sleeves will work, though. The most important thing is to get those recipes down so that future generations will be able to keep your family history alive.
Subscribe to:
Posts (Atom)