Thursday, April 29, 2010

Another tangent - what IS it about cats?

They have to be right in the thick of things, always.  I'm in the middle of a project, and Simoon just has to be on top of it.  Even when there's more than enough empty desk space, she decides to relax by balancing on papers, pens, and ink pads while pushing other things off of the desk.  She's pushed a tasty Parmesan crusted stuffed chicken recipe off of my desk twice this week!  (If you make this recipe, I would put the chicken under the broiler for a few minutes to brown the parmesan some.)  Right before the following picture was taken, she knocked off a set of rubber stamps.  She looks pretty comfy, eh?


Look at that huge cat-sized open space on the desk!

Speaking of tasty new chicken recipes from the Kraft Foods website, we tried the Chicken in Creamy Pan Sauce tonight.  Next time, we're doubling the sauce and serving it with egg noodles.  Very tasty!

It's not just when I'm crafting that the cats are pests.  Earlier this week we had our oldest cat, Miss Katy, groomed.  Her long fur was turning into huge clumps of felt again.  Steve could not leave the couch that night - she was on him like white on rice.  He made the best of it by reading.... until:


Pixel makes a better door than a window.  At least he settled down:


Look at our poor Katy!  I hate that they gave her a lion cut.  I know it's best for her, but she looks so sad!  Steve noted today that Katy has "Flashdance" legwarmers, and he made her do the "Maniac" dance.  She was not amused.

Surprisingly, Fe (our youngest kitty) hasn't been a pest lately... Oh, wait, that's right.  She knocked over a basket in the kitchen which nearly landed Steve's iPod in the cats' water.

Now I know there are tons of crafters out there with cats... what antics have they been up to?  Leave me comments, please!  (I'll be happy with dog stories, too!)

Monday, April 26, 2010

Easier mini gift albums - Part 3

Here's the last of the mini gift album series (for a while).  The tips for this 8x8 album are the same as the last one, but the papers are so cute (as is the subject matter!), I just had to share.  I made this album for my mother, and it's all about her dog, Cappuccino.  I used papers, embellishments, and ribbon from the same set and supplemented with some cardstock.  The title letters were done with the Blossom QuicKutz font, and I used a number of cut-out flowers with brads as the centers.

Here is the title page:


This next page is with some close ups of the pup:


I used some of the ribbon to frame a picture of one of Cappuccino's favorite activities, playing with a tennis ball:


This last page is to show you some doodling that I did as frames around the pictures and the sticker:


 Oh, okay... since you've asked so nicely, here's one more, just because it's so cute and miraculous:


This is my Mom cuddling both Cappuccino and my cat, Pixel, back when he was still little enough to cuddle.

Guess I should work on making more gift albums so I have more to show you!

Saturday, April 24, 2010

Easier mini gift albums - Part 2

Today's mini gift album example is an 8x8 album I made for my stepfather for Father's Day.  He has always been wonderful for me and has always gone above and beyond for me, my friends, and my pets.  I used a paper pack called "Butcher's Block" in blues and beiges.  I used solid beige and green cardstock that looked good with the pack.  For titles I used letters (positive and negative) from the pack as well as letters cut using the Marissa mini font from QuicKutz.

Using one set of papers and one font really helped the album go together quickly and look great (if I do say so myself).

As promised, here are some examples:

Title page:


The next page shows what you can do with those infrequently used letters.  It uses them up and also gives a playful feel to the page:


John made me a mailbox using old computer parts, and he painted it my favorite color.  Ingenious!  I wanted to showcase that more by cutting letters out of a close-up photo, framing one with a negative of one of the bigger letters:


Since I've posted pictures of my Mom and John, I think it's only fair to post some of me...


Wednesday, April 21, 2010

Easier mini gift albums - Part 1

I have done a number of gift albums since I started scrapbooking.  They have varied in size from very small to 12x12.  As I "matured" in my scrapbooking I learned a few methods to make gift albums look better and take less time to create.  (I say "matured" in quotes because I still giggle like a 10 year old whenever someone says "duty").

There are a number of different albums I would like to describe to you and show you examples from, but I'm not going to do it all at once - I don't want your heads to explode.

Today's album is one I did for a party for my Mom's best friend.  She was very ill for a long time, and this party was a family reunion during a time when Donna was home.  She has since passed, and I was glad I could make this album for her.  She really enjoyed it and often looked through it.

First of all, I made sure that at the party I took a picture of everyone as well as taking some candid shots.  Once I printed the pictures, I purchased a spiral-bound album from a scrapbook store so it would be durable.  I ripped out all unused pages when I was finished.

I used a wheel stamp for a green swirly border on the edge of each page.  That was the only pattern throughout the book.  I then adhered the pictures and used other stamps, one style of letter stickers in different colors, summery embellishments, and my own handwriting to finish the album.  I also put little bling crystals on the border in random places to give the book some extra zing.

I scanned the pages of the book before I gave it away, so I'm sorry the quality of these pictures isn't the best.  The spiral binding got in the way.  Since I unfortunately am not in touch with anyone anymore and can't ask permission to post their pictures, I will only be showing two pages - the introduction and one with my mother and step-father.


These pages give a pretty fair representation of how the whole book looks.  I used bright colors and embellishments - it was a summery party, after all.  I was pleased with how quickly the album went together and how well it was received by everyone.  Donna crocheted my baby blanket, sewed my tap dance costumes, and helped Mom raise me along with her own daughters.  I was glad to give just a fraction of that love back to her.  Okay - enough of that.  I'm about to tear up over here.  I love you, Donna!

For you non-scrapbookers out there... you can do this without all of the fancy embellishments and stamps.  You can doodle around the pictures and on the edges of each of the pages.  (Doodling is huge in scrapbooking.)  The most important thing is to get the pictures down and to note who everyone is and what happened at the event.  Use your own handwriting - that gives the album a very personal touch, and your recipient will always think of you when flipping through your thoughtful gift!

Friday, April 16, 2010

What I have been pondering lately...

I was talking to a new friend last week about how she transitioned to a career in jewelry making, designing, and teaching.  I have done this a few times to give me some ideas on what I could do with my career - how can find something that I love where I can also be creative?  She gave me a lot of good things to think about, and she mentioned that it would be great if I could mix my technical knowledge with my creativity.

We also talked about her website - how out of date it was and how someone had hacked into it and put links to, uh, non-jewelry related pages (we'll leave it at that).  I offered to look at the source for her, and later that day something clicked in my head - there must be a number of creative people just like her who don't have the time and/or the expertise to build a website and keep it updated!

I thought a lot about it and have talked to pretty much everyone.  If I haven't talked to you about it, don't worry - I'm sure you're on my list!  :)  I have researched and researched and researched some more.  The more I think about it, the more I really want to do this.  I have a name for my business already - Creative Pursuits Web Design - and I'm taking a class next week that will tell me everything I need to know to get things started.

Why am I limiting myself to creative folks?  I understand them because I am one!  I will be able to take each client's personality and make a page that reflects their creativity and their craft.

I know I'll still need to get another job so I have steady money coming in, but I will really enjoy the day when I can work on websites all day!

Tuesday, April 13, 2010

Faux Resin

I've been interested in resin projects for quite a while, especially the ones where a bezel is filled with "stuff".  I have a few gold-tone blank bezels I recently received in a goody bag, and since I don't like gold very much, I thought this was a wonderful opportunity to experiment!  I don't have resin but I do have Diamond Glaze (DG), a scrapbooking product that can also be used for projects like this.

After lining the entire inside of the bezel with a thin coat of DG, I put in a piece of gold paper to fill the bottom and sides.  I then placed a small circle of pink patterned Japanese paper and poured DG about halfway.  To simulate grass and sky, I put some green beads at the bottom and blue beads at the top.  When that was dry I placed a little butterfly I cut out from a patterned piece of paper and filled the rest of the bezel with the DG.  At some point I had to add more DG due to settling.

From what I've heard and read about this process, you need to have an open mind.  The results will not always be what you expect.  I gave you the full description because something unexpected definitely happened:  Most of the blue beads seemed to have disintegrated.  It gave a very interesting effect:


It's really hard to take a picture of this kind of project, even under an Ott light.  I hope you can see that the entire piece is infused with blue.  Most of the little circles at the top are former beads.  To give you an idea of the size, this time I brought a penny:


I think it turned out well, even with the disintegrating beads and the few air bubbles.  The butterfly is right where I want it, floating above the grass and flowers.  I may have to make a necklace to go with this!

Sunday, April 11, 2010

Experimental scrapping

This is a project I created last November, not too long after I got my Gypsy.  I did post about this on the Cricut message board (http://www.cricut.com/messageboard/tm.aspx?m=5728235&mpage=1&key=&#5728235), but I want to include it here as an example of non-traditional scrapbooking.

Steve and I have 4 cats (we each had two cats when we met), and we were able to catch glimpses of them starting to get along - my Pixel with his Fe, his Katy with my Pixel, my Simoon with his Fe.  (Pixel and Fe are the youngest and the most easy-going).  For the end of our "First year of marriage album", I wanted to show these pictures and created a double 12x12 layout, using a coordinated set of cat papers from Cloud9Design.

I have difficulties mixing patterned papers.  I even bought Ali Edwards's book, A Designer's Eye 2, which helps you work with patterned papers, but I still have problems, even with papers like these that are MADE to go together.  There are small dots, circles of different sizes, words all jumbled together, etc.  That doesn't even take COLOR into account!  The saving grace with this set of papers is that they are double-sided with solids on the back.  I have used them before on other pages with the solid colors as the background, but for this set of pages I "Mixed Me Up"!

Here are the full pages:


The pens that are meant to go with the Cricut die cut machine are really thick markers.  QuicKutz has pens for their Silhouette that are thin but also happen to fit in the Cricut blade mechanism.  I used the Gypsy (the handheld design tool for the Cricut) to create the title, overlapping the letters of "Mingling" to signify how our "families" are overlapping.  The text is from the Plantin Schoolbook cartridge, both regular and italic, and the frame is from Home Accents.  I drew the words and frame first then cut it out using the shadow shape of the frame:


I had tried to do a bigger shadow for layering behind, but with the little nubbins in the top left and lower right, it just didn't work.  That sparked an idea, and I used differently sized pieces for mats and frames, flipping them over to use the solid side, which also flipped where the nubbins were.

Here is Pixel and Katy with the shape used as a mat:


And here is Pixel and Fe sharing a meal in a frame:


I tried to have the patterns and solids evenly distributed across both pages, which was difficult because of what paper I had left.  I believe I made it work, however!

The tag in the upper left of the second page is also from Cloud9Design (this is how they getcha - embellishments to go with the papers!  I think I bought them all...), and it reads, "Cats have it all - admiration, an endless sleep, and company only when they want it."  That sums up this household!

Here's an update - we have had up to 3 cats sleeping with us at night, and there has still been no cross-cuddling.  It's early days, though!

A (not so) slight detour

I have always been mildly interested in my ancestry but never put any effort into it.  The show "Who do you think you are?" has sparked that interest in both Steve and me, and we have joined Ancestry.com for one month, just to see what we could find out.

Well, joined isn't right.  "Thrown ourselves into head first without any idea of how deep the water was" would be better.  We stayed up until 2:00 am Friday night/Saturday morning researching things and spent a lot of time yesterday and today on the site.

I, for one, have found quite a bit on my father's mother's side.  It can get very confusing, because there is so much information out there, and I can link to quite a number of members' trees, but I have found pretty solid evidence that we have deep colonial roots through my great-grandfather's (Wilbur Andrews) side of the family.  His mother was Mary Edna Ball, and that just opened everything up.  I did not know this, but the Ball family is huge, and I even found something on Google books for a lawyer called Abraham Lincoln Gary (I would give more information, but my cat Simoon is sitting on my notes and the printout from the book - ooh, wait - she sort of moved...) from Rush County, Indiana that gives his lineage back to the 1600s.  Mr. Gary's mother, Phoebe Jane Ball, is the sister of William Ball, Mary Edna's father, so they were cousins.

Anyway, long and confusing, but through this book and other information I found on Ancestry.com, I found a few relatives who were soldiers of the Revolution!  Another search found pictures of graves for them, Zopher Ball and Caleb Ball, plus a number of others in the family.  Zopher Ball's grave has a backing stone saying he was an Ensign in the Revolutionary war, and a bronze plaque from the Daughters of the American Revolution stating he fought in the war.  Caleb Ball's stone states he was in the War of 1812.

Based on what I've found, I've barely scratched the surface of how far back I can go.  Going back from Zopher Ball (I think that name is so cool, but Steve won't agree to name a son Zopher if we ever have one), I have only followed the fathers.  I've noted the mothers, but I'll have to get back to them later.  If I'm figuring things out right, my ancestor William Ball who was born in 1615 came here from England in 1674, and I can follow his fathers back (using others' family trees) to the 1200s.  There are a lot of Williams, Johns, and Roberts, so I'm not convinced yet I have everything right.  I stopped at William DeBaliol (1251-1313).  A few of the member family trees have his father being a King of Scotland, but there is a lot of conflicting information.  I want to verify each of the steps, using external-to-Ancestry.com information if possible before I start calling myself royalty.  :)

Looking through all of this is fascinating.  I know some information on my mother's side.  We're German but for a time lived in German colonies in Russia.  I will definitely try to research that more.  For my father's side, though, I assumed I wouldn't be able to get very far.  I never heard about anything.  Come to find out there's an enormous amount of information out there, and I'm a part of a huge family that people have researched for years.

I can't wait to delve into the mothers and see what I can find out there!

Thursday, April 8, 2010

Tale of a Toggle

Yesterday I mentioned the bracelet I made with a hole for a toggle.  This was something else I had to undo a number of times, first because of experimenting with the stitch (Peyote) and then because I didn't have enough purple beads to make the bracelet as wide as I wanted.  Finally, I finished a thin, sparkly Peyote bracelet and set to work on the toggle.

I was at a friend's house on Monday, and after I started the 6 bead long toggle the book suggested, she thought it would be too small for the hole and would easily fall out.  She suggested 8 beads, but I ended up with one 9 beads long.  Here's where my Mom says, "But you got a Math minor in college!  How can you not count, add, or subtract?"  Here's where I say, "It's not Linear Algebra!  Now please could you add my dice together so I can fill out my Yahtzee scorecard?"

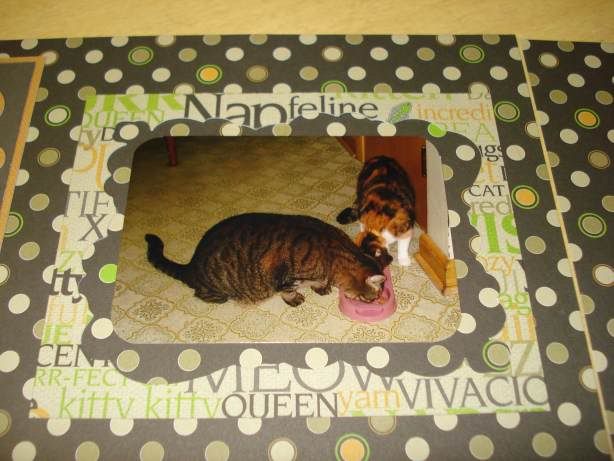
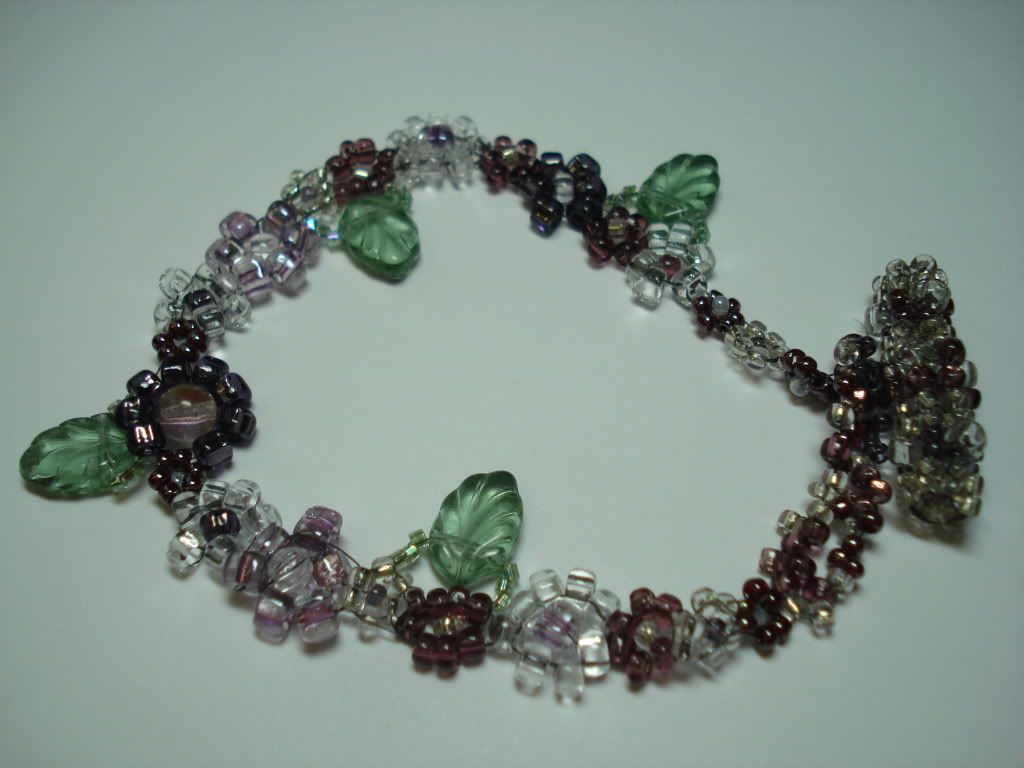
It was a good toggle - nice and tight.  After sewing it on, we determined it wouldn't fit in the hole.  I had to take it apart because I didn't have enough purple beads for another attempt.  While dinner was cooking that night, I frantically ripped apart the 9 bead toggle and made an 8 bead one.  I wanted to get it done so I could wear it to the Loose Bead Society board meeting that night.  Here's the bracelet and the 8 bead attempt:


Believe me, the beads are purple.  Very subtle, but still purple.

It's getting close to the time when I need to leave for the meeting.  Does the toggle fit?  No!  Do I have any beads or buttons that will fit and would look nice?  No, of course not!  Oh, well.  The ladies will see the bracelet another time.

That's when I got the bright idea to bead a bead, leading to yesterday's discussion of the Penta-Petal bead.

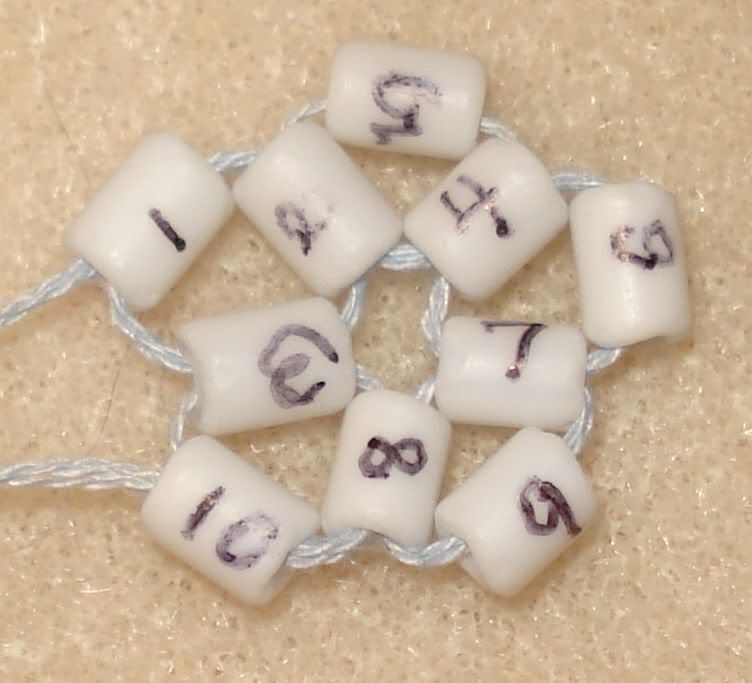
Tonight I took another shot at it, this time with the clear beads used in the rest of the bracelet.  Since I did the whole numbered bead thing, I was able to do it in one attempt!  Say, that worked pretty well...  I'm going to have to try that right angle weave beaded bead again!

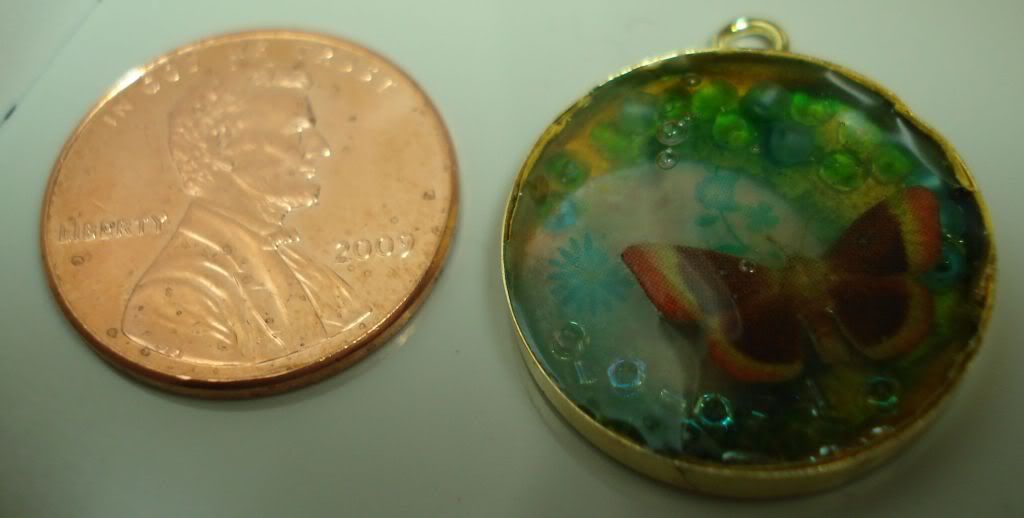
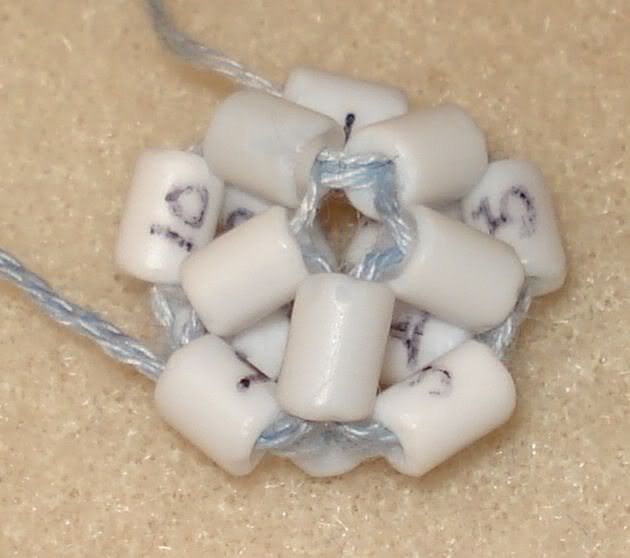
Here is the bead after steps 1 and 2, with the numbered one so you can see the size comparison:


I should have put a penny or something in there so you get a 
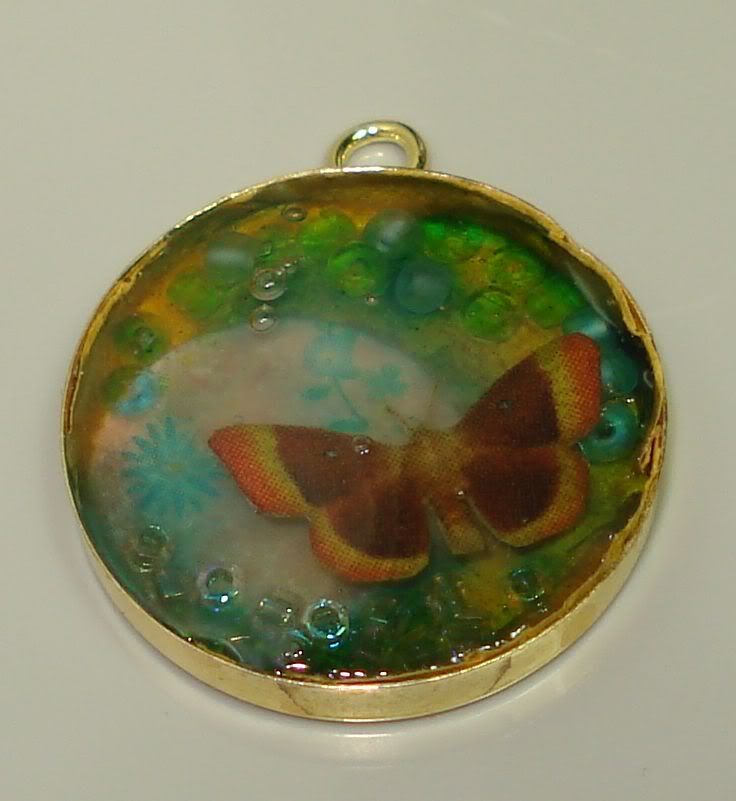
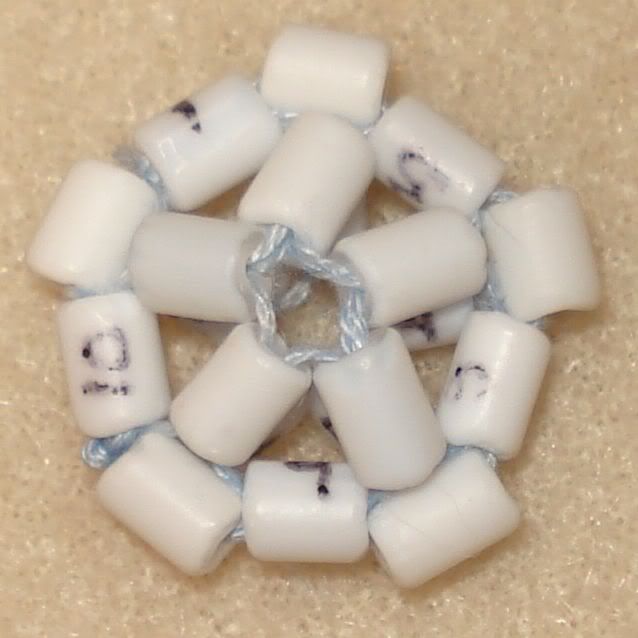
real size comparison.  And, yes, I know I need to get some clear Fireline.  Since the bracelet was pretty plain, Steve had suggested I add an embellishment to the top to liven it up.  I thought, "Why not have the toggle be that embellishment?"  I added some petal beads between the circumference beads (numbered 1, 5, 6, 7, and 10 above) but thought that looked too plain.  I then added more petal beads in the blank spaces and a purple bead for the center of the flower:


I flipped 'er over and added some beads to make a quasi-shank:


This didn't work quite as I had hoped because of the hex shape to the beads - the shank is a bit Pisa-Towerish.  Steve then asked the $64,000 question: "Will the bead fit through the hole?"  I did try it with only 5 petals, and I assumed it would work with 10.  I wiggled, shimmied, and twisted.  Then I wiggled, shimmied, and twisted the bead until it went through the hole.  It wasn't sewn onto the bracelet yet.  I decided to try, and if it didn't work, I would remove it and sew it onto the top of the bracelet and make another bead for the toggle.


So far so good!  Now let's try it on:


Whew!  That time it was easier.  I bent the petals up and worked it through.  The good thing about this is that this bracelet will not accidentally come undone and get lost.  Of course, will I be able to take it off?

I'm not 100% positive I like it.  I think it's because the petals move around a lot.  Steve says that it's organic, and some of my Loose Bead Society friends know I have difficulties with things that are organic.  The vast majority of my career has been pretty technical (as computer programmers are supposed to be), and I like symmetry and orderliness.  It takes quite a bit for me to "bead outside the box".  The Spring bracelet I posted about a few days ago was one of those I had to look at again and again before I decided I liked it.  Perhaps this will grow on me, too.

If I'm not able to get it off, it probably will grow on me!

Wednesday, April 7, 2010

Why NOT number them?

A few months ago we had a hands-on project at the Loose Bead Society to make a right angle weave beaded bead using Swarovski bicone crystals (with the crystals donated by Swarovski!!).  A number of us hadn't done that before, so we were each given a sheet of instructions in which the beads were numbered in the diagram.  Well, all of the beads were the same color, and I got very confused.  At one point I exclaimed, "Why aren't the beads numbered?!"

Fast forward to this week.  I am trying to make a toggle bead to fit through a hole I have already made in a peyote-stitch bracelet.  I thought I might try a beaded bead and found the Penta-Petal Bead project in the Mastering Beadwork book I have mentioned before.

Yup.  You guessed it.  The diagram has the beads numbered, and I got confused.  I was okay until Figure 7, which is where the beads kind of stack up to create the dimension of a beaded bead.  I ripped it out a few times then thought I should try it with bigger beads and embroidery floss so there would be less slippage.  I still got lost.

The beads I used are white cylinders with a matte finish.  The proverbial light bulb lit over my head, and I grabbed a Slick Writer pen.  For those who don't know, Slick Writer pens are great for glossy surfaces such as pictures, vellum, and any other slippery or possibly slippery surfaces.  They can be found in any respectable scrapbook or craft store with scrapbook supplies.  Use a Slick Writer pen to write on the backs of your photographs instead of a ball point pen.  There is no smearing, no indenting the paper so what you wrote is visible on the front of the picture, etc... I could talk for an hour on this.  Make sure you get a fine point pen - there are different widths.

What was I talking about?  Oh!  Beads.  Sorry - got off on a Slick Writer tangent.  I do that from time to time.  I grabbed my trusty fine point Slick Writer pen and numbered 10 beads.  After the first round of triangles, this is what I had:


Not the best handwriting, but they're small curvy beads.  Yes, there are triangles there - trust me.  I really wish the diagrams in the book had numbers for all of the beads instead of just the first 10, but using my handy-dandy numbered beads, I was able to complete the second step:


And finally, the last step:


I assume it's right.  It does look like the picture.  I may have to try this for all of the stitching projects that I get stuck on!

Now for making the beaded bead using the small 8 hex beads...  Stay tuned!

Tuesday, April 6, 2010

It was a Cricutastic day!

It all started one morning last Fall.  I had stayed at my Mom's for the night and didn't go into work right away because of an inspection on my house in Waukegan, Illinois.  We went out for breakfast at the Sunset House, and I saw a card on their bulletin board that I instantly recognized as being created with the Cricut - the font was distinctively "George", the font that comes with most Cricut machines.

I looked inside and found that it was created by Bertha.  I posted about it on the Cricut messageboard (http://www.cricut.com/messageboard/tm.aspx?m=5610419&mpage=1&key=&#5610419) to give Bertha a nod and see if she was on the board.  Well, she didn't respond, but Sylvia did!  She posted that her mother grew up in Waukegan, and we started chatting.... first on the message board, then in e-mail, then on Facebook.

Her husband's parents live near Portage, Wisconsin, which is about an hour and a half away, so when Sylvia and Dave planned a visit to see the Brewers and the Rockies play, she was also able to come and visit!


It was such a LOVELY day!  We chatted like we've known each other our whole lives. And, most importantly, she was able to pet all four cats!!  This was quite an achievement.  Katy usually runs right under the bed, but she was strangely compelled keep looking at Sylvia.  She didn't come near, but when she was on the bed, she did not protest us petting her.  And Simoon, our other mostly-anti-social cat actually came up to Sylvia!  Twice!


We had a nice lunch out at a new Italian place nearby, and then we "got to work" while we chatted.  I played with her Heritage cartridge (this is one that I've wanted and she brought it so I could make a few cuts and look at the book), and she played with my Gypsy (it's a portable design tool for the Cricut. She thought she wanted one before, but now she definitely does... Sorry, Dave!).


It's hard to spontaneously come up with something to cut, but with a train buff in the house and with a tree I fell in love with on the cartridge, here's what I cut:


The tree on the right is a slightly larger shadow of the tree on the left.  I forgot I still had the shadow button on.  I've gotten spoiled by using the Gypsy and nearly forgot how to manually make a cut!

Unfortunately, she had to go around 4:00... but before she did, we were able to take a picture together (my Cricut station is the perfect height for a camera with a timer!):


There were many hugs, lots of laughter, serious conversations about all kinds of things, good food, and CRAFTING!!!  It was a perfect "first play date", and I'm so glad she was able to come!


{Oh - in case you haven't read the post on the Cricut message board... I actually found Bertha at a craft fair in Waukegan last December.  She was selling cards with the characteristic George font.  I nearly screamed with excitement and told her the whole story!  She was tickled pink!}

Sunday, April 4, 2010

Spring...

I was right - Summer went away and Spring came back.  We had a little bit of rain Saturday morning, and it got a little chilly.  We went out later and BOOM! everything looked greener.  The trees and bushes are starting to bud, but the grass is starting to look phenomenal.

The weather today was gorgeous, and I commented to my husband that Spring is my favorite time of year.  We're shaking off the cold nastiness of winter, and everything's coming to life again.  That's the obvious reason everyone gives, but for me it seems to go a bit deeper.  The temperature may be the same in April as it is in September, but Spring just feels different and makes me feel different.

I love opening the windows and letting the air move through the house.  In my old house I didn't do this.  I just opened the front and sometimes the back door and let the wind blow through the screens.  Here we open the curtains and the windows and throw Fe (she's the most portable of the cats) onto a window sill.  The other cats will migrate to the other windows over time.

I feel energized and motivated and want to do things (generally not housework, unfortunately).  I think I will let that feeling grow this Spring and see what I can accomplish!  Stay tuned!

Saturday, April 3, 2010

Speaking of color...

I am very proud of my craft room.  When my husband looked through the house he took one look at this room with its built in boomerang-shaped desk and said, "This is Traci's room!"  We loved the rest of the house, too, and have been here since October 2008.

Before I would move any of my stuff in, however, I declared that we needed to de-green it.  Not that I don't like green, but my room HAS to be purple.  Of course.


Isn't he sweet?  Well, we properly purpled the room and moved me in.  I love it in here.  Now that I have a laptop, I'm in here all the time.  I have one bookshelf for my scrapbooks and scrapbook magazines and books, plus a few odds and ends:


Another bookshelf has my jewelry supplies, magazines and books, my crochet magazines and books, and more odds and ends, plus a wheeled cart I've had FOREVER that has a jumble of jewelry supplies (extra points to anyone who can tell me what the most prominent stickers are from).  On top of a cart is a pyramid of clear containers from The Container Store (love that place!) where I have chipboard, pre-cut mats, and slides and frames.


Turning the corner there is one of the two doors and the start of my "close at hand" scrapbook materials.  The two black carts have drawers for scrapbook paper.  Each is labeled with what is inside, so I can easily find the color of paper or theme that I need.  On top is my Cricut station.  My stepfather found these two cabinets in the basement - they're perfect!  To the left is my non-Stampin' Up! stamps, my inks, and my portable stamp tote.  The drawers are also labeled so I know what is in what drawer.  I did this using stamps and Staz-On ink.  That stuff is amazing, and I use it quite a bit.


Oh, yeah, there's the cat bed, too.  :)  You can also see some of my Stampin' Up section, but this next pictures shows that part of the room better:


I have baskets for punches, containers for SU! pens, acrylic stamps, wheel stamps, embellishments, ribbons, etc...  The binders you see are for my extremely obsessive compulsive stamp index.  I'll post about that another time.  Also, to the left you can see my tote that I take with me to crops.  I put what I need in that and maybe one other bag, bring my Cricut and Gypsy, and off I go!  No more dragging out the big wheeled container.  That is hiding in the closet.

The final picture is my desk.  It's clean for once but doesn't stay that way long:


Here I have my most frequently used items - pens, scissors, embellishments, ribbons, patterned scrapbook paper (although my cats Simoon and Pixel like to lie on it to keep me company.  Fortunately it zips closed!), phone, pictures, etc...

To the left is the closet which has shelves.  More of my supplies and extra cardstock are in there.  And to the left of that is the other door, and we've finished the circle of my room.

You can see all over that I have a ton of iris pictures, various knick knacks, and inspirations.  In this last picture you can see the @, *, T, and Create.  They've all been stamped on (with Staz-On).  I love altering things like this to give items my own flair.

I love my room, love being in here, love that my cats feel comfortable spending time with me in here, and love that it's organized in a way that I can quickly find what I need so I can spend more time on my projects!

To quote "The Stepford Children", "I'm a VERY lucky girl!"

Friday, April 2, 2010

Color makes a big difference

We had spring in Wisconsin this week.  On Wednesday.  It was beautiful!  Then we had two days in a row that hit 80 degrees.  Well, it was nice while it lasted!  It's only April 2nd, so spring should be back soon.

In the last few months I have started learning to do bead stitching.  Previously I have strung beads (single or multi-strand) and worked with polymer and silver clay, but I thought that stitching was too difficult.  I've made some friends after I moved up here at the Loose Bead Society of Greater Milwaukee (check out our website at http://www.loosebeadsociety.org, of which I am the Webgoddess), and they have helped me overcome my "aversion to stitching".

On the recommendation of one of my new friends, I bought Mastering Beadwork: A Comprehensive Guide to Off-loom Techniques by Carol Huber Cypher. This book is really good at showing a number of stitches, including peyote (flat, tubular, and circular), herringbone (flat and tubular), spiral, square, etc... it just goes on and on.  You can find it on Amazon, and it's very reasonably priced!  It is spiral-bound, so you can leave it open while you work.  Very useful, unless a cat is sitting on it, which regularly happens in our house.

In the Daisy Chain stitch section I liked the idea of the Springtime Chain Bracelet but not the colors.  I'm pretty conservative with my color choices and have to really force myself to go beyond my norms: purple (in case you haven't noticed!), black, white, grey, silver, smoke... The bracelet in the book has BRIGHT colors: green, yellow, orange, peach.  That just would not do.  In the words of my dear, departed grandmother, "How would that look?"

I searched through my stash and even spent a few hours digging through a jar of bead soup to find just the right colors.  I had more sedate green leaf beads that I loved, and I found purples, clears, slightly metallic clears, and light greens enough to make the bracelet:


I had a bit of a problem with the toggle.  My first attempt was huge, and off it went into my "sample tin" of experiments with different stitches, the effect of using different beads, and what material was used.  This is a great idea, by the way, given to me by my same friend who suggested the book.  You should see her sample box!  Anyway, the second attempt worked better, and while it is still a little large, the bracelet stays on my wrist.

I was working on this at a bead retreat the Loose Bead Society had a few weeks ago, and everyone who saw it marveled at how different it looked from the picture, just by changing the colors.  All this by looking at the piece behind the project, if that makes any sense.  I frequently will pass by projects in books and magazines because I didn't like the colors that were used.  I am now going back through my magazines and marking those projects with the techniques that I want to try - colors be damned!

Do you have any similar stories?  I'd love to hear them and even see pictures if possible!

Thursday, April 1, 2010

A new beginning...

Hi!  I've finally joined the blog "craze".  As I mention in the description at the top of the page, this is going to cover quite a number of different things.  I want to show and explain a number of different crafts and techniques for those crafts.  For the most part I have made things up as I go along.  If something doesn't work, I'll make do with what I have or I'll try something else.  I'm sure a lot of us out there do the same.  Hopefully I can save you from making some of the same mistakes I've made.

Another area I'm going to explore is changing careers - particularly my own.  I have been a computer programmer for most of my career, and while it can be interesting work, it's not where my heart is.  I love working with people, teaching, and creating things (anything!), and I would like to move towards a career that will make that happen.  I know it will take some time and a whole lot of effort, but I'm sure that in the end it will be worth it.  I will be describing here what I am doing, what I hope to do, what works, and what doesn't work.  Hopefully it will be of use to some of you and to me.

Please feel free to e-mail me with questions or suggestions!  I'm on Facebook (under Traci Southern Otte), so you can look me up there as well.

Well, here we go.....